Postman collection
Postman Collections allow you to group API requests and examples, keeping your workspace organized. You can collaborate with teammates, and automate request runs. To learn more about collections, visit the Organize and automate API requests in Postman Collections guide.
Additionally, you can view documentation for individual requests within our collection, complete with sample request and responses.
Step 1
Download the collection file
Step 2
Importing the collection into Postman
Step 3
Navigating and editing variables
Step 4
Basic authentication
Step 5
Test an API request
Step 6
Select environment and send the request
Step 7
Inspect the response
Using FastPix API collection
Step 1: Download the collection file
Navigate to API references where the API collection is available. On the left navigation menu scroll to the bottom and click on “Download Postman Collection" or use the link below. This downloads and saves the collection file (usually in JSON format) to your local machine.
For now, you can Click here to download and run the official Postman collection for FastPix.
Step 2: Importing the collection into Postman
This requires you to open Postman. If you haven't already, download and install Postman from https://www.postman.com/downloads . Once you launch Postman, in the top-left corner click on "Import".
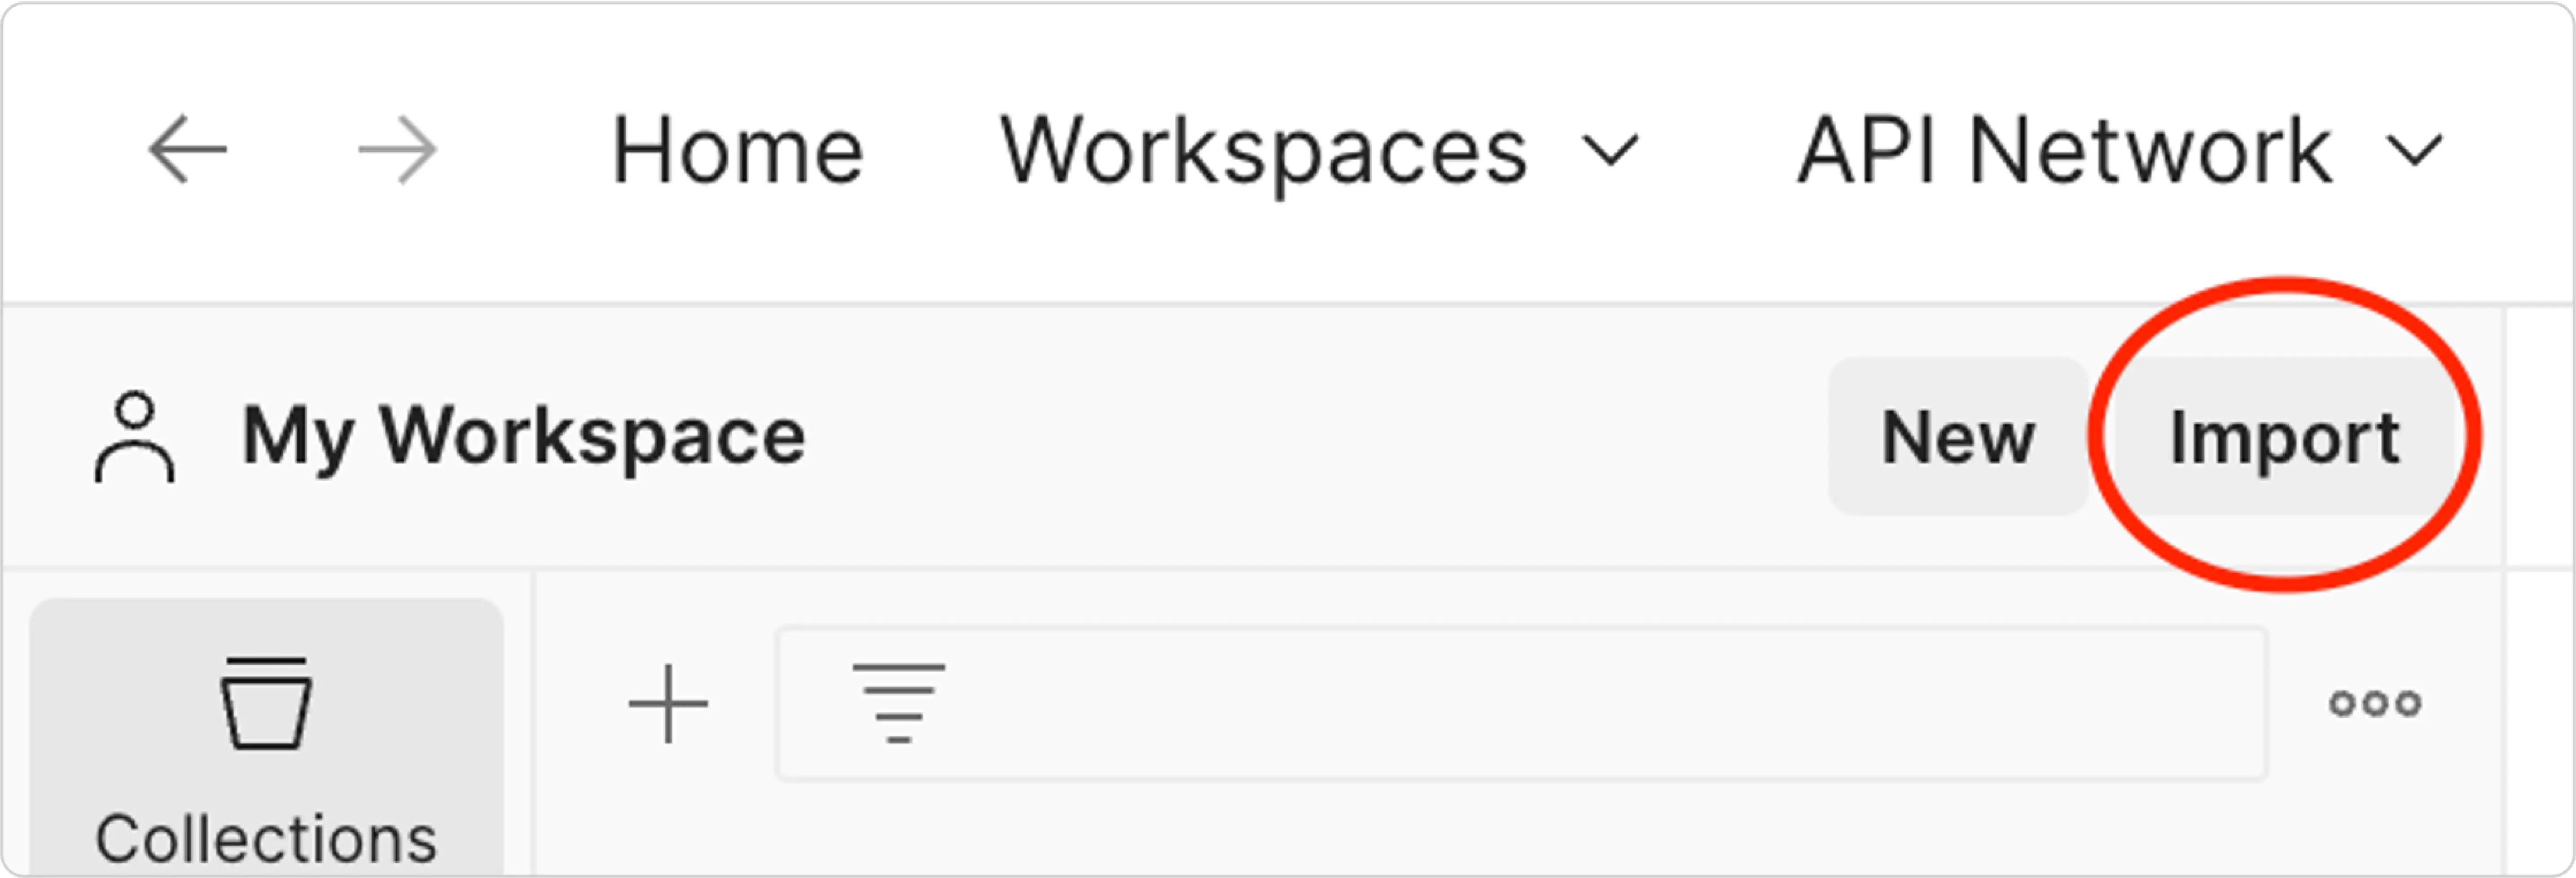
Choose the downloaded collection file (.json) from your local machine and click "Open" or "Import" to import the collection into Postman.
Step 3: Navigating and editing variables
When you navigate to the left sidebar of Postman, you'll see the imported collection. Click on the collection name to expand it and view its folders and requests.
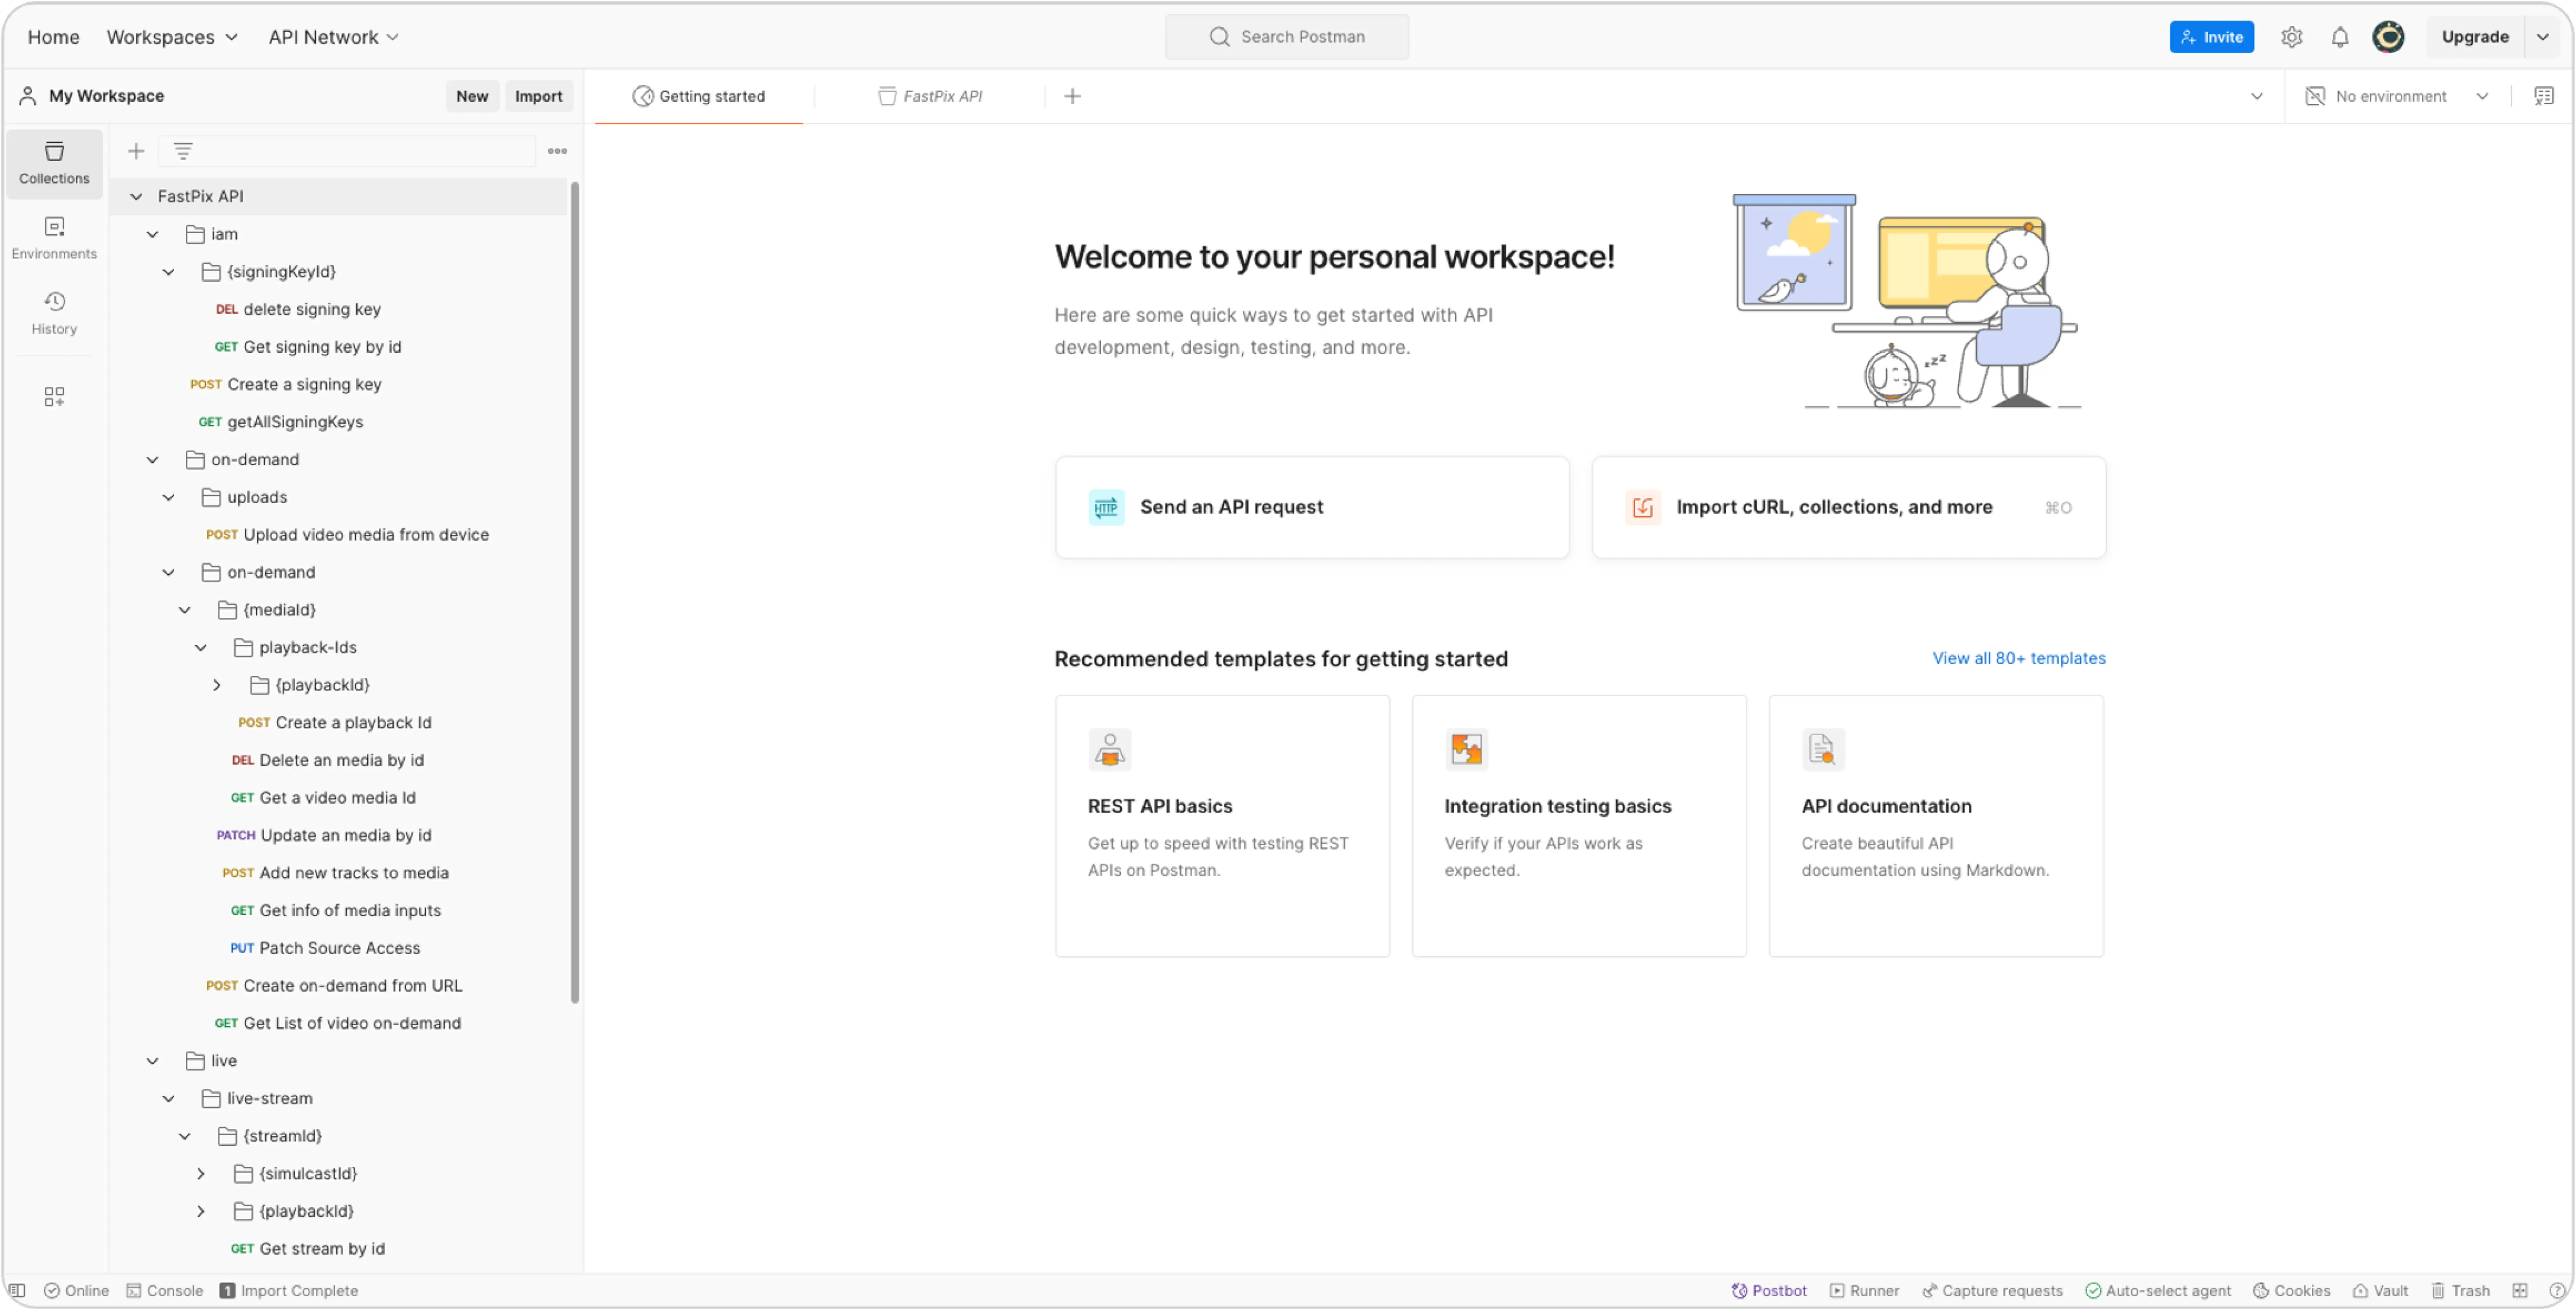
Now to edit environment variables, follow the steps below:
- In Postman, go to the left sidebar and click on Environments.
- Click Add/Create Environment to make a new environment.
- Name your environment, for example, "FastPix API Environment."
In the Variables section, add variables for baseUrl, username, and password (these will store your FastPix API credentials). - Set the variable values to your actual username and password for the FastPix API. You can follow the instructionsin Step 4: Basic Authentication to retrieve these values.
- Once done, click Save.
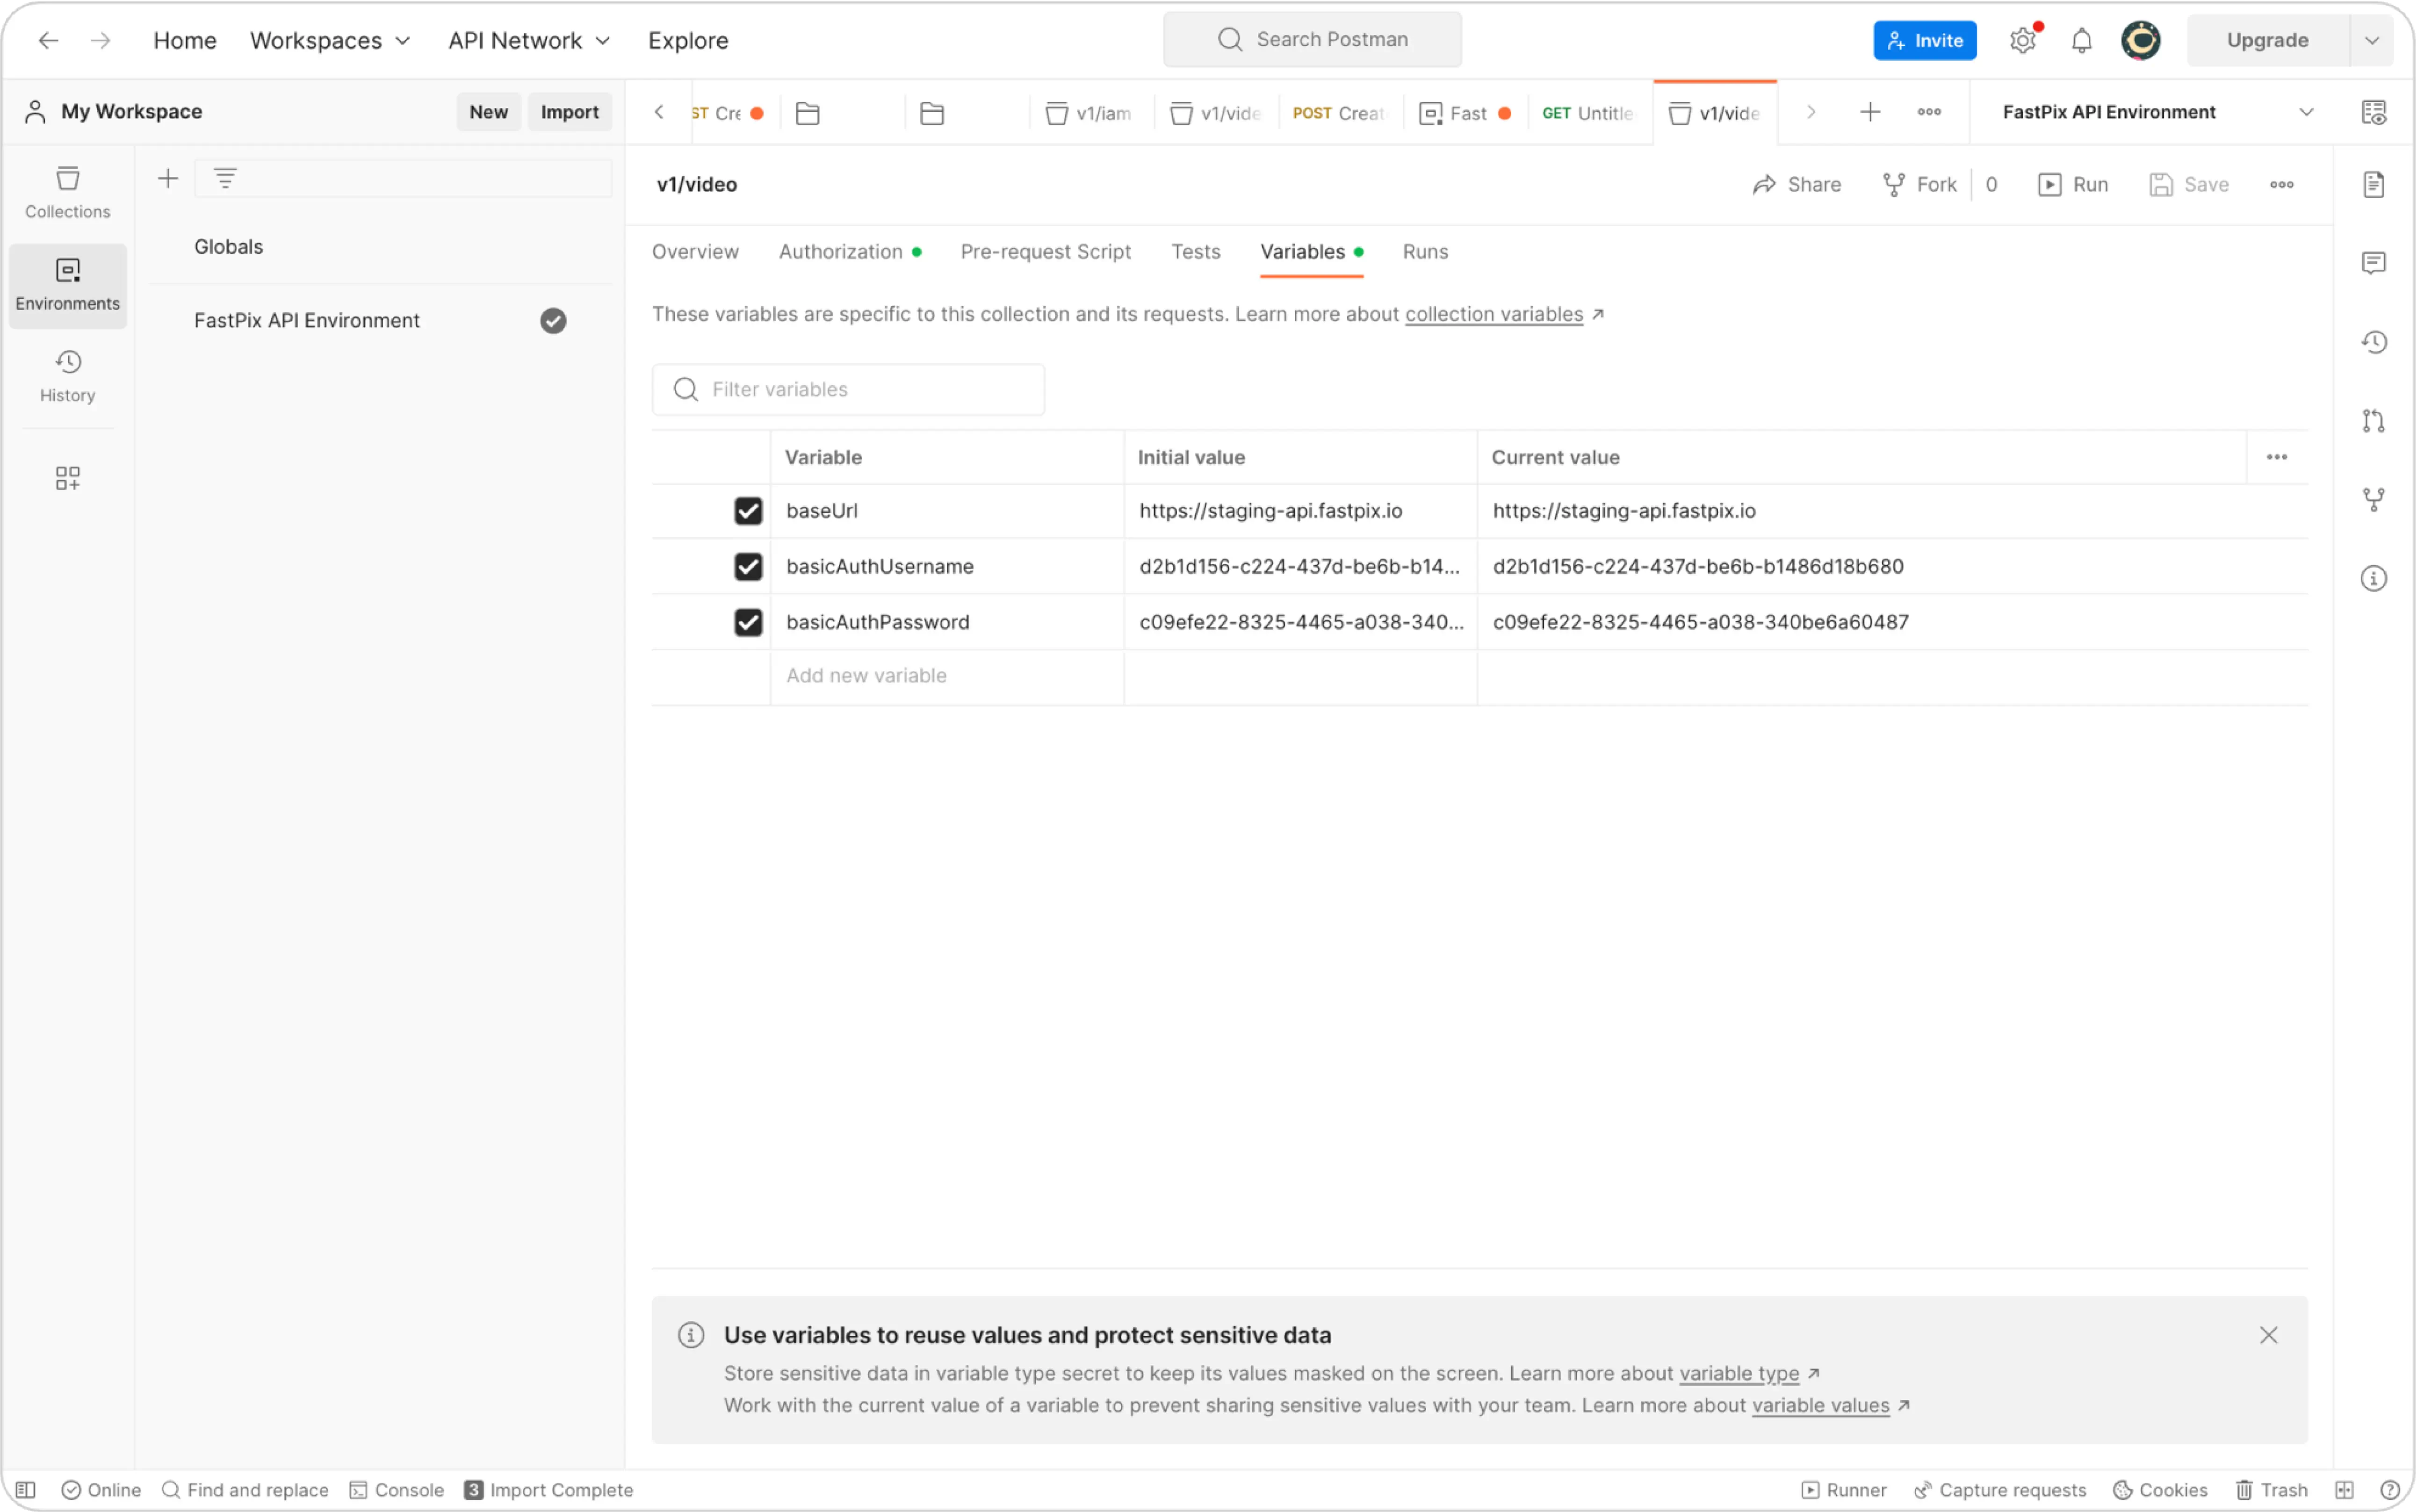
Alternatively, you can edit variables directly by selecting the collection, navigating to the "Variables" tab, and updating them.
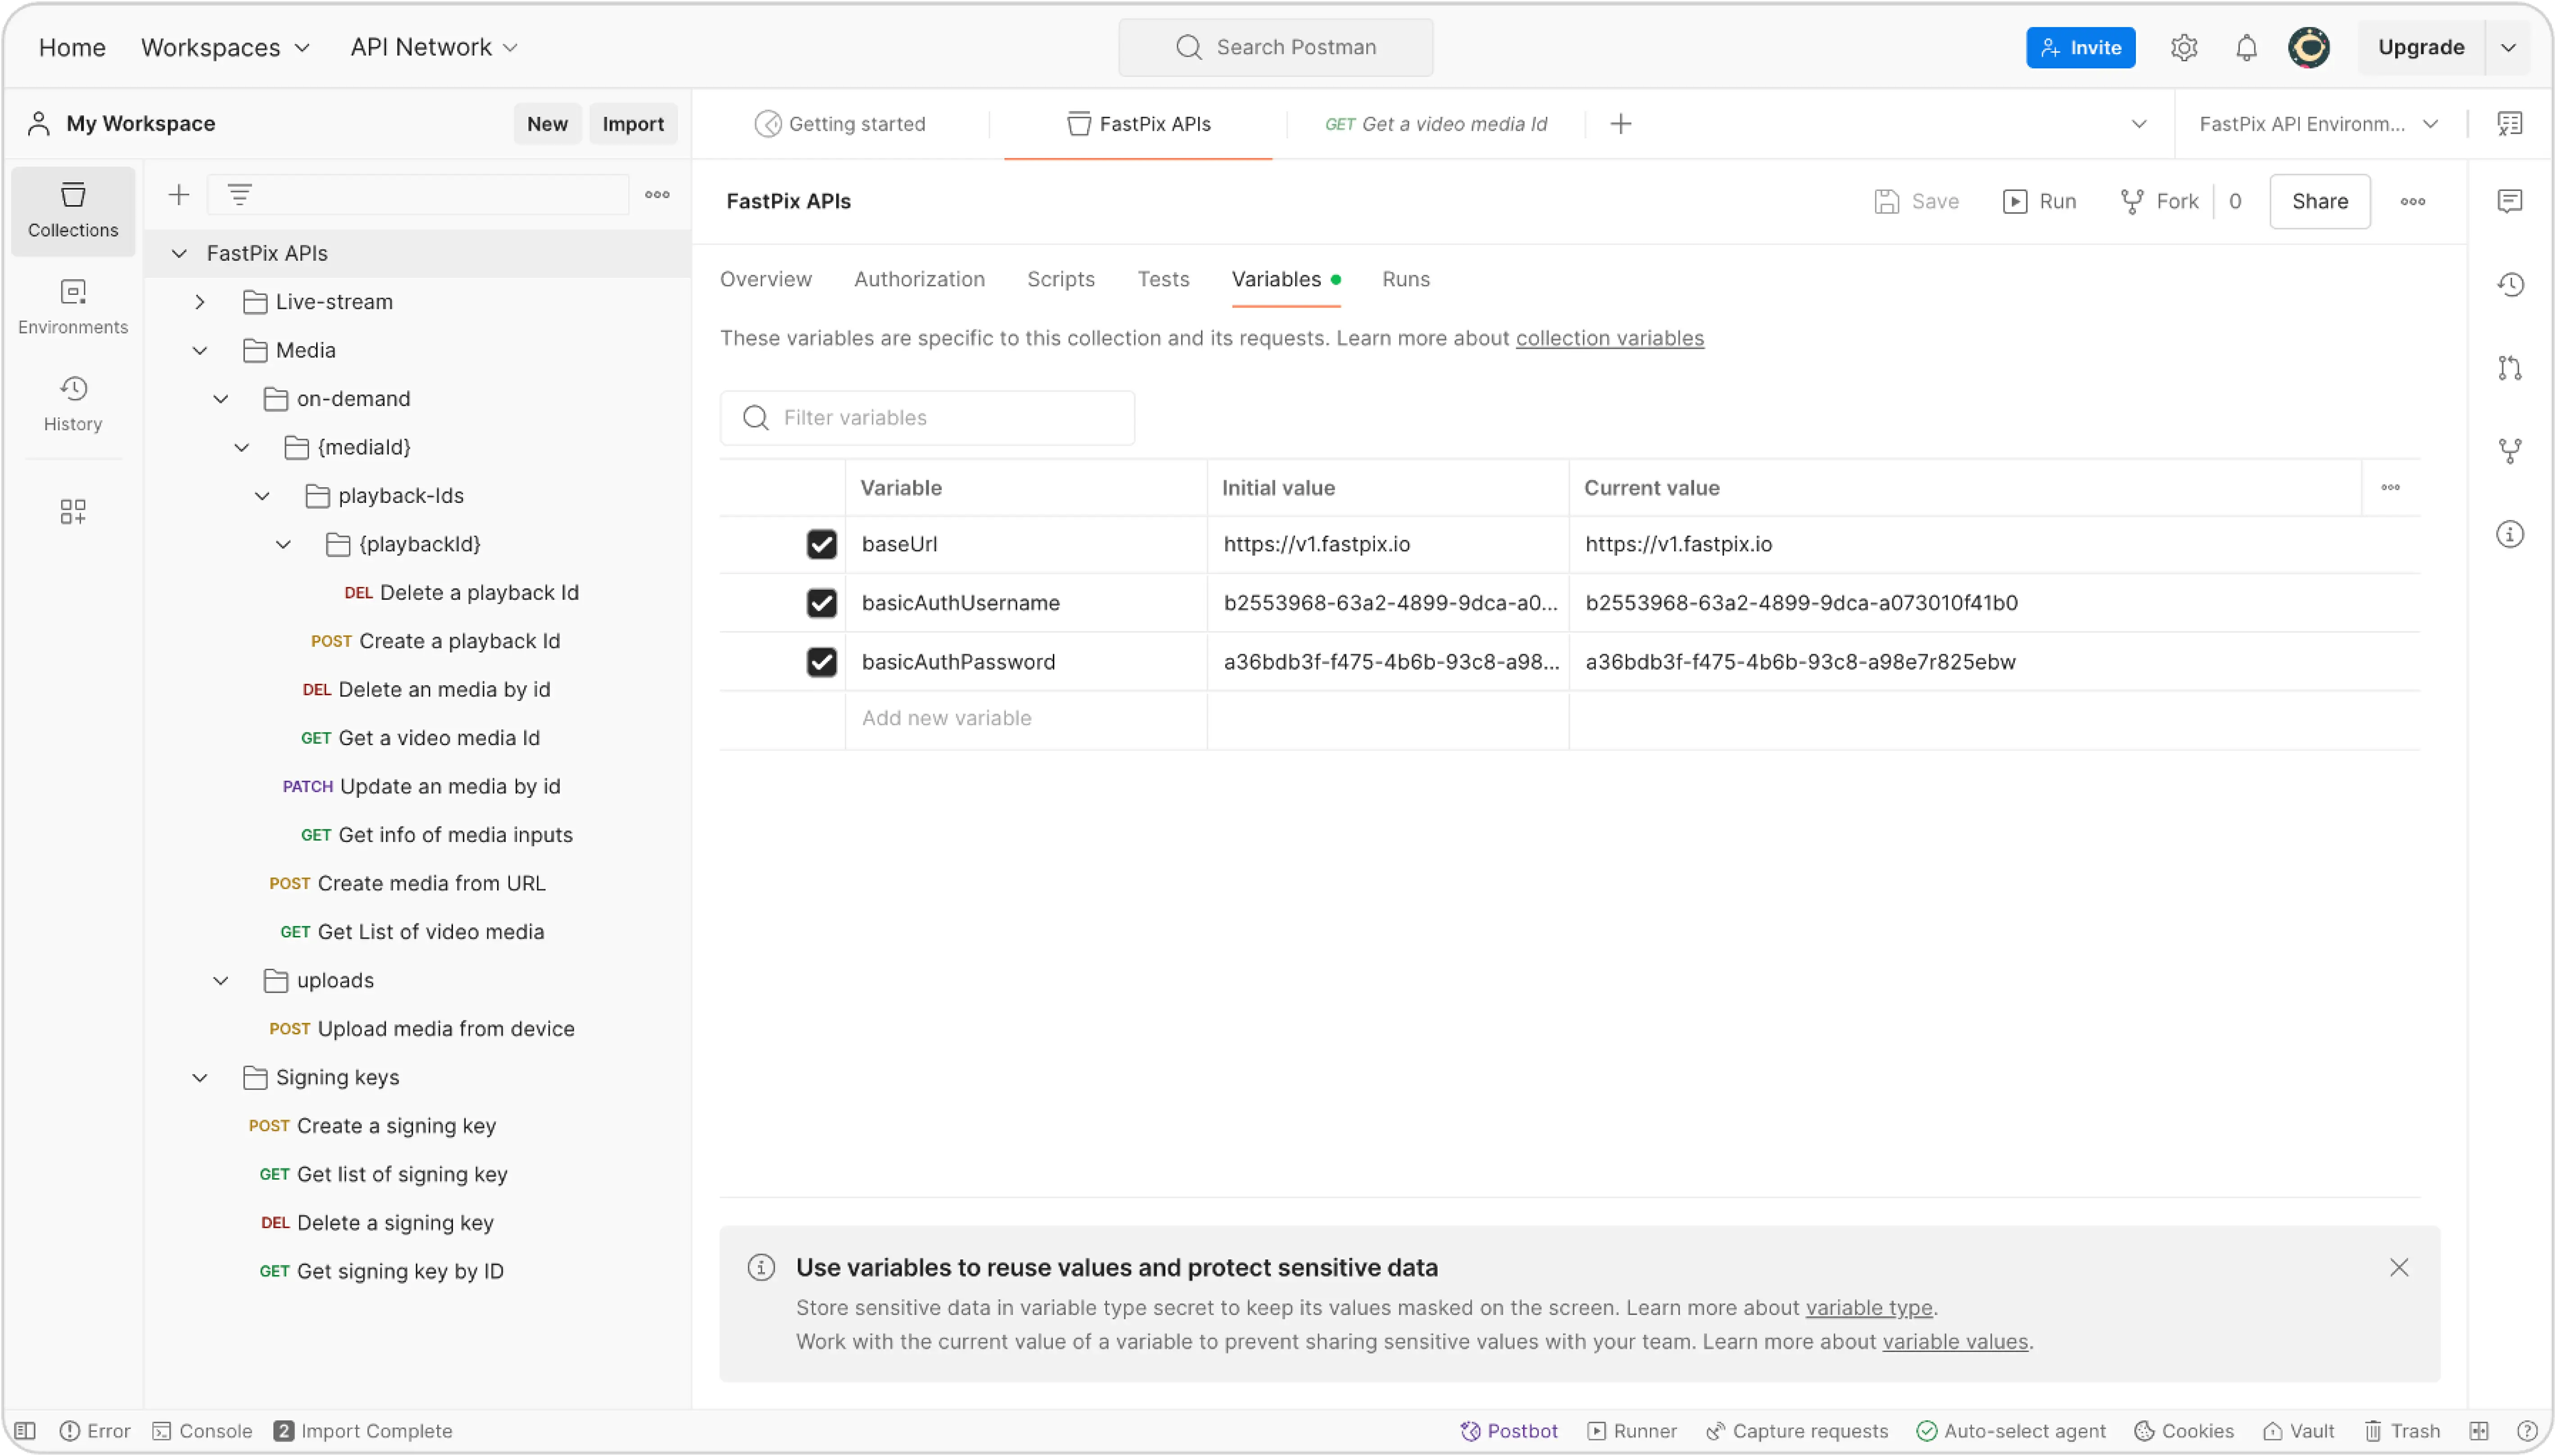
Step 4: Basic authentication
Each API request to FastPix requires authentication through an Access Token, comprising an ID and a secret key. The Access Token's ID serves as its “username”, while the secret functions as its “password” in basic auth. Read the Get an API Access Token guide to know more about how to generate an Access Token.
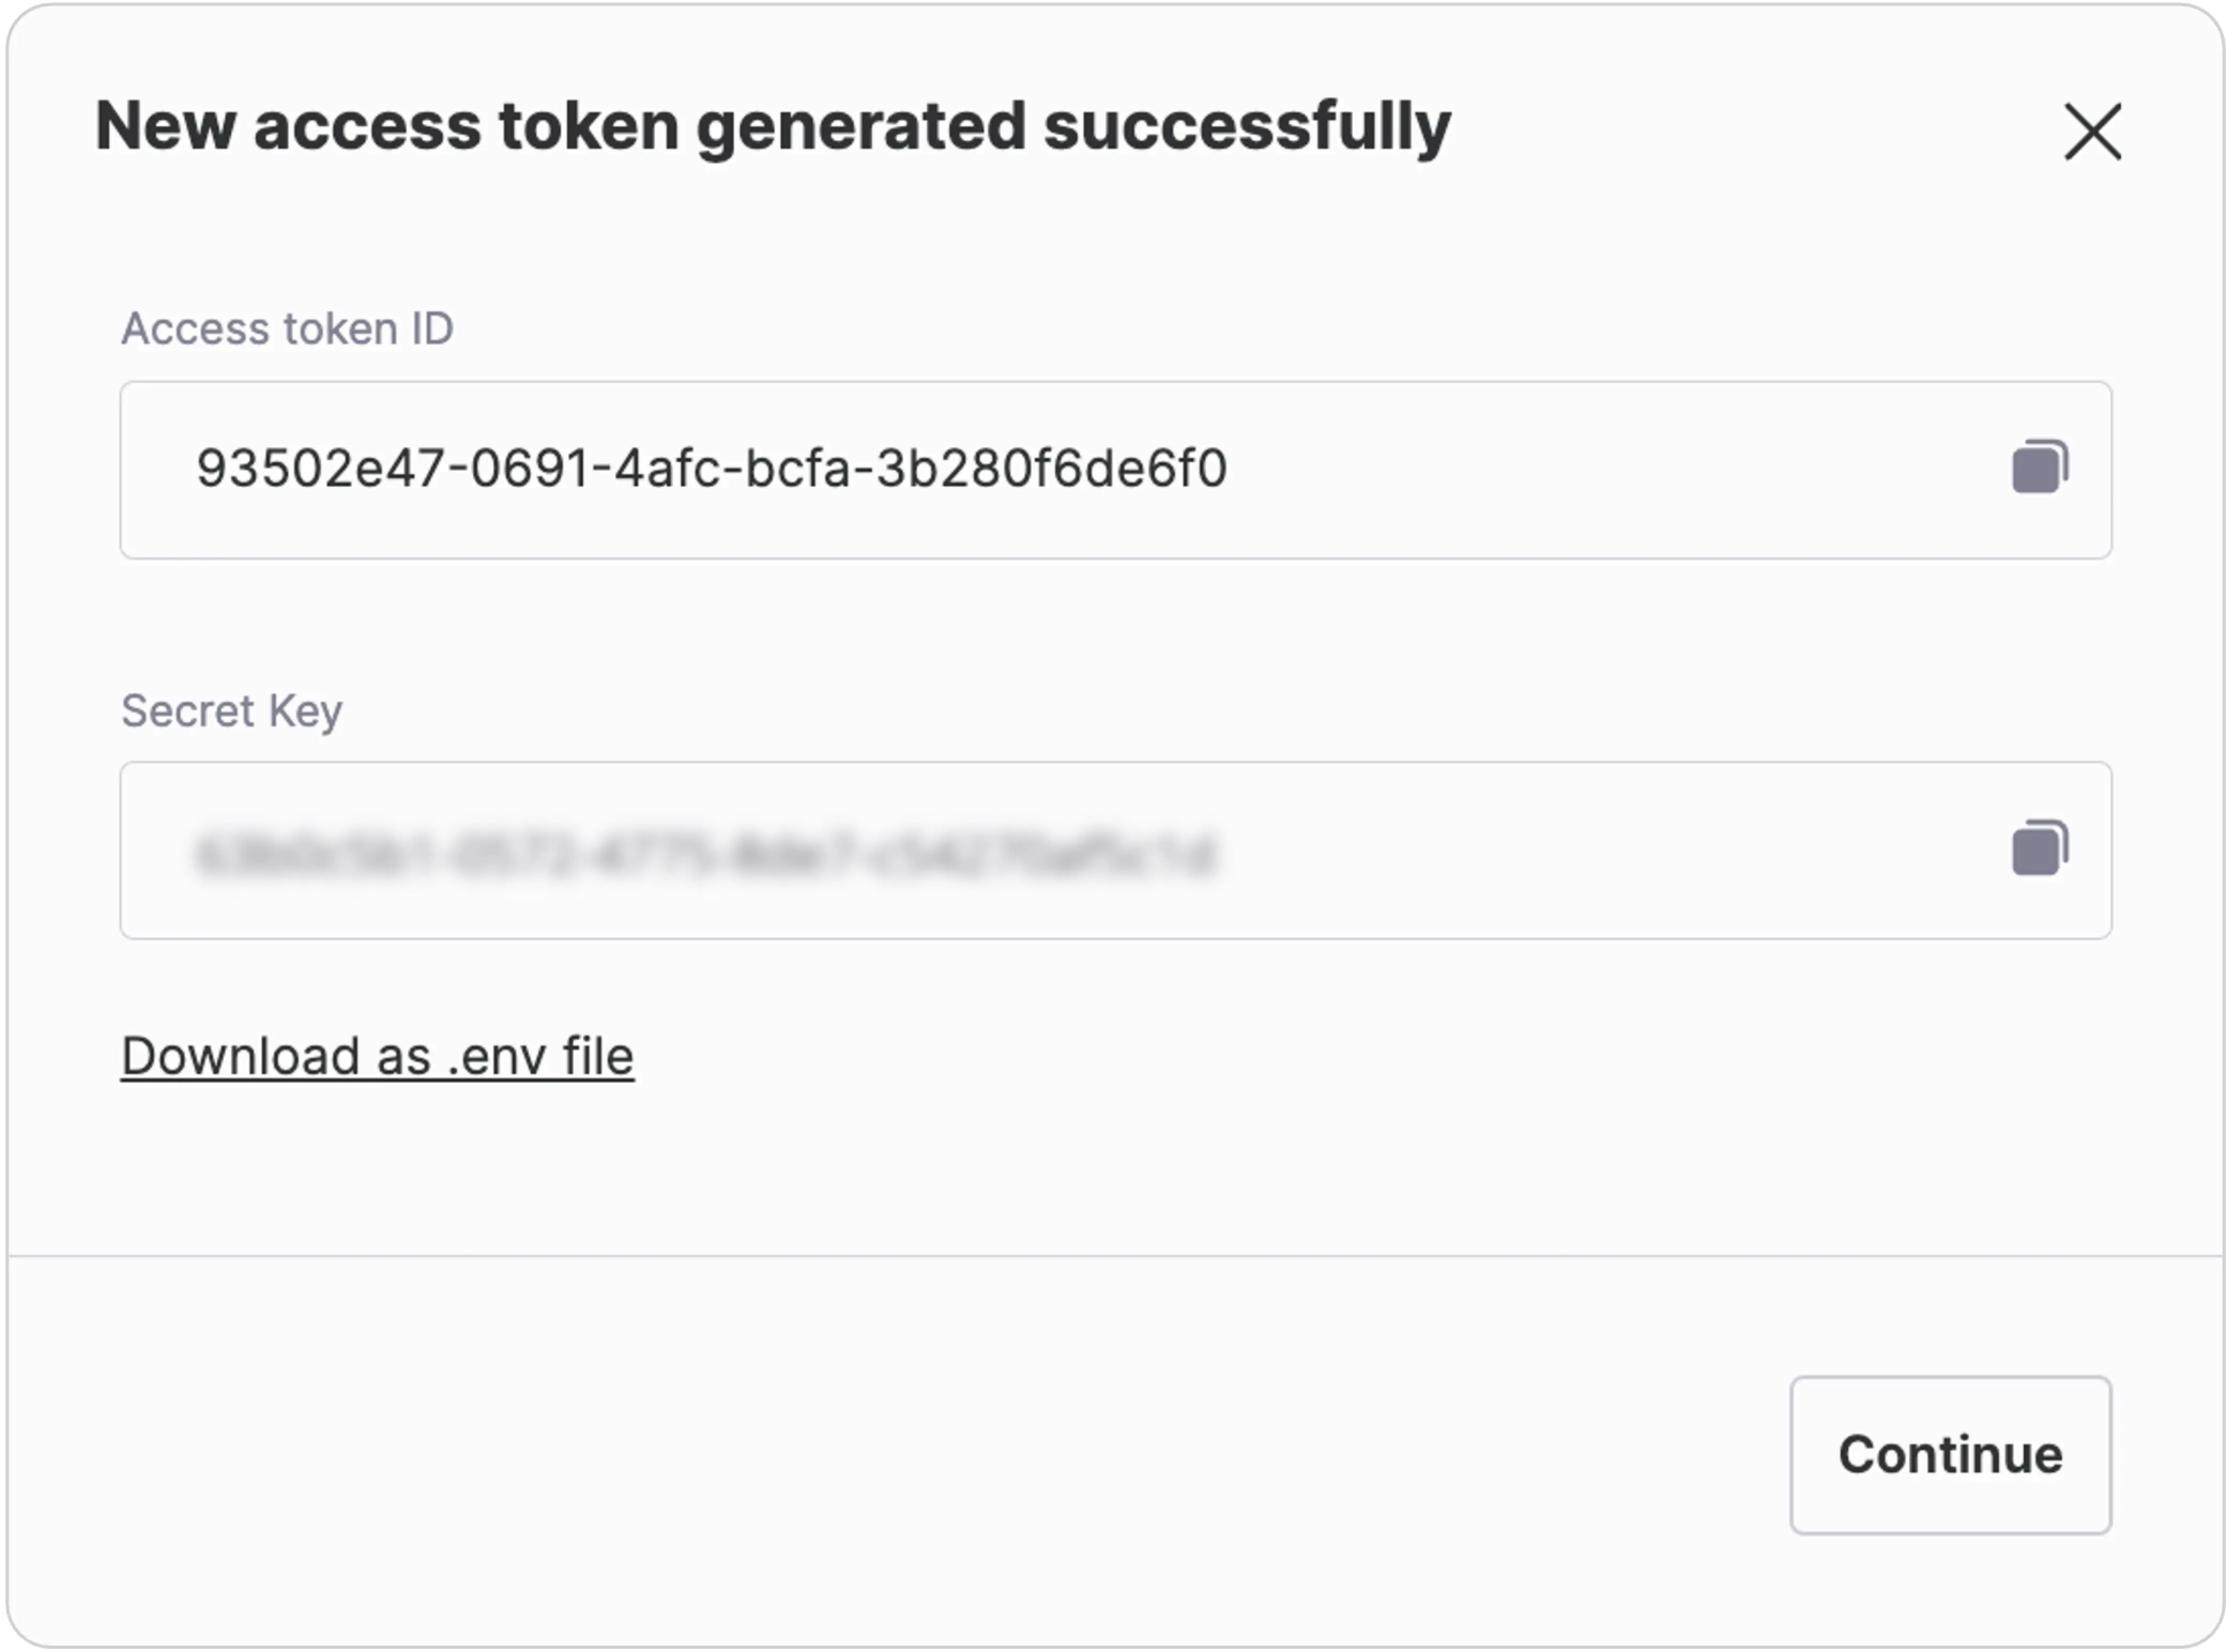
Once you have your credentials, set them as variables in your Postman environment as described in Step 3.
Step 5: Test an API request
Getting started with any new API can be confusing. To make things smoother for you, FastPix provides example requests and responses in API references. Think of these examples as step-by-step guides that show you exactly what information to send to FastPix (the request) and what kind of data you'll get back in response. This helps you understand how to interact with the API effectively.
To proceed with testing the APIs, first you need to navigate to the request within the collection that you want to use as a sample. Click on the request to open it.
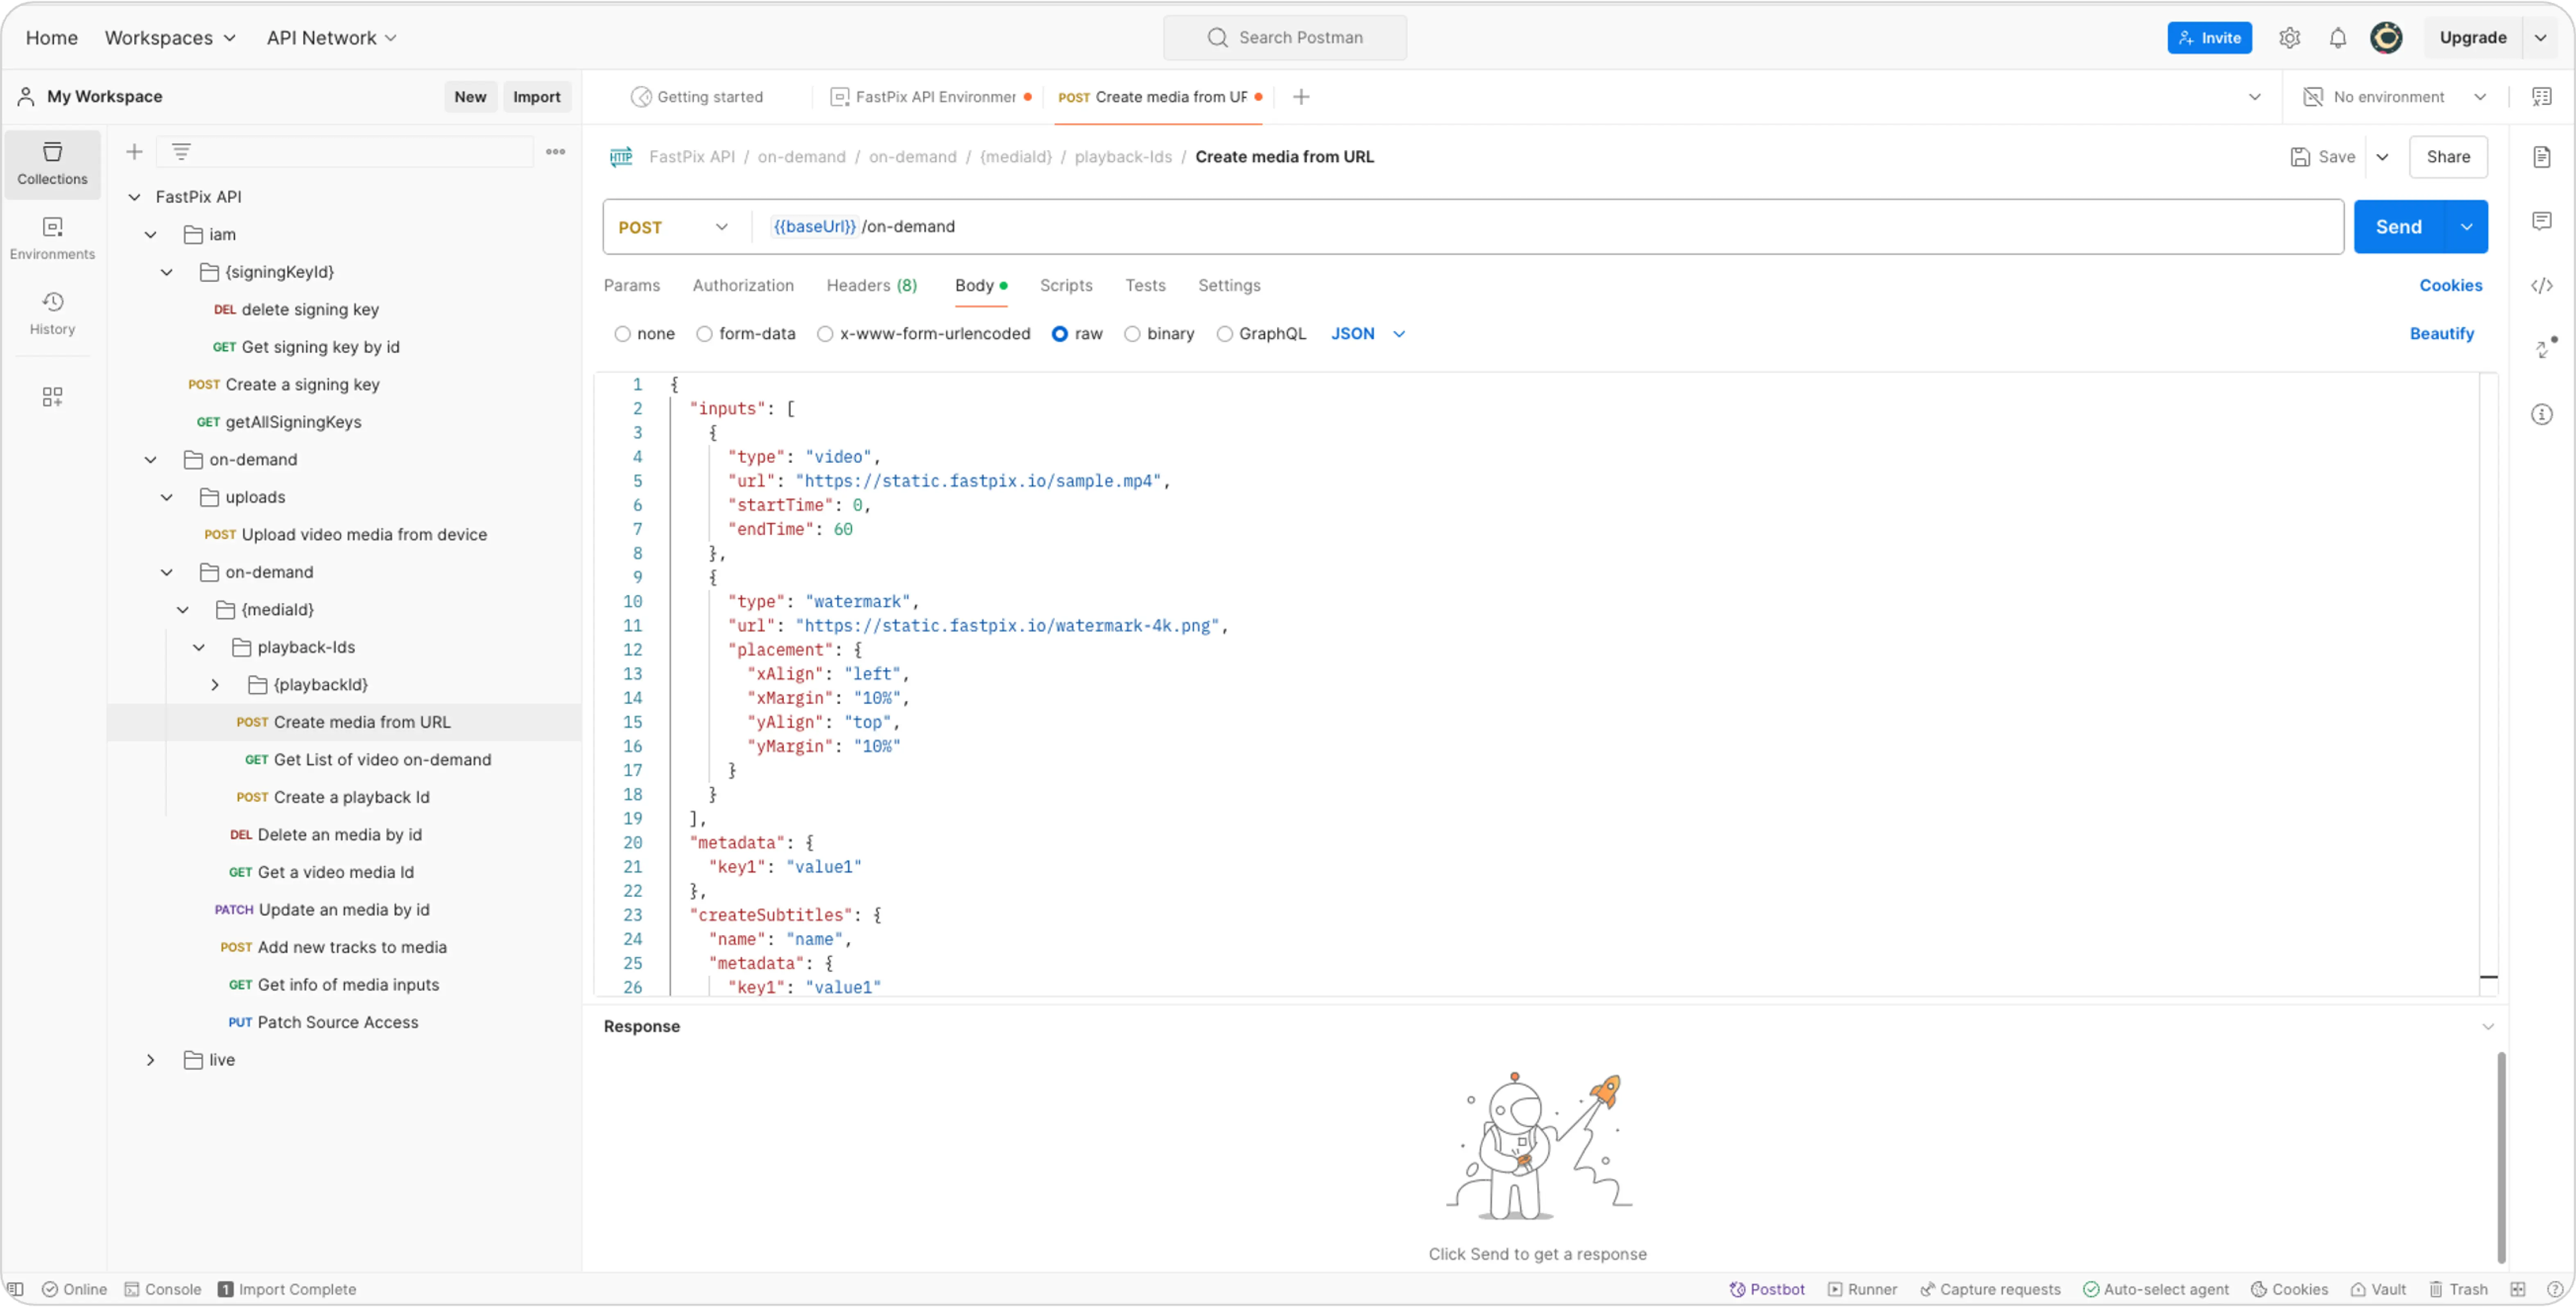
Once you have your credentials, set them as variables in your Postman environment as described in Step 3.
Step 6: Select environment and send the request
In the top-right corner of the request window, you'll see an environment dropdown. Select the environment you created earlier (e.g., "FastPix API Environment").
To proceed with testing the APIs, first you need to navigate to the request within the collection that you want to use as a sample. Click on the request to open it.

Once the environment is selected, you can send the request by ensuring that the request method, URL, headers, and body (if applicable) are correctly set according to your requirements. Click "Send" to execute the request.
DOUBLE CHECK YOUR SETTINGS
- Make sure the request method (e.g., GET, POST) matches what the FastPix API expects for that action.
- Verify the URL is correct for the specific API endpoint you're using.
- If required, ensure any necessary headers are included in your request (these are like labels that tell the API more about your request).
- For certain actions, you might need to provide a request body. This typically involves sending data like a video file or other information.
Step 7: Inspect the response
Once you send the request, Postman will show the response from the FastPix API.
- You can view the response body, headers, and other details to verify that your request was successful.
- If there are errors or issues, Postman provides details to help you troubleshoot.

Once you have your credentials, set them as variables in your Postman environment as described in Step 3.
Reuse data with variables and environments in Postman
Postman offers variables in an environment to make it easier to change variable values based on your work context. By storing a value as a variable, you can reference it throughout your collections, environments, requests, and scripts. This enables you to dynamically switch values like API keys, URLs, or authentication credentials based on the environment (e.g., development, production). Postman will use the variable's current value when running a request or script.
For example:
- In Postman, go to the left sidebar and click on Environments.
- Click Add/Create Environment to make a new environment.
- Set your baseUrl to the development or production server based on the environment.
- Reuse variables throughout your requests and collections, making it easy to switch between different configurations without manually updating each request.
Updated about 1 month ago