
Setup webhooks
Transmit event data from FastPix to a designated destination using HTTP requests.
Create webhooks
Webhooks are a mechanism for communication between two web applications in real-time.
FastPix uses webhooks to tell your application about things that happen in the background, outside of the API regular request flow. These events could involve media creation, update, or deleting. For instance, if an asset goes from being processed to ready, or if a live stream starts or stops, we'll shoot a POST message to the provided address when these events occur. Once you set up a webhook for a specific workspace, it will send notifications for all events in that workspace.
Requirements for webhooks implementation
Create a webhooks endpoint:
You need to create a designated endpoint on your server to receive incoming webhook requests from FastPix. This endpoint, usually an URL, will serve as the destination for data sent via the POST method when specific trigger events related to on-demand video and livestreaming occur within your application.
Identify the trigger event:
Determine the event or action in your application that should trigger the webhook. For instance, it could be a new user signup, a file uploaded, start of a livestream or any viewer interactions.
Configure webhooks in FastPix
Head to your FastPix dashboard and navigate to "Org Settings" to set up webhooks.

Once you click Create new webhook, you can choose the workspace you want notifications for in FastPix. Also, enter an URL from your application that FastPix will notify for event notifications. Click the "Create new webhook" button to start receiving notifications.
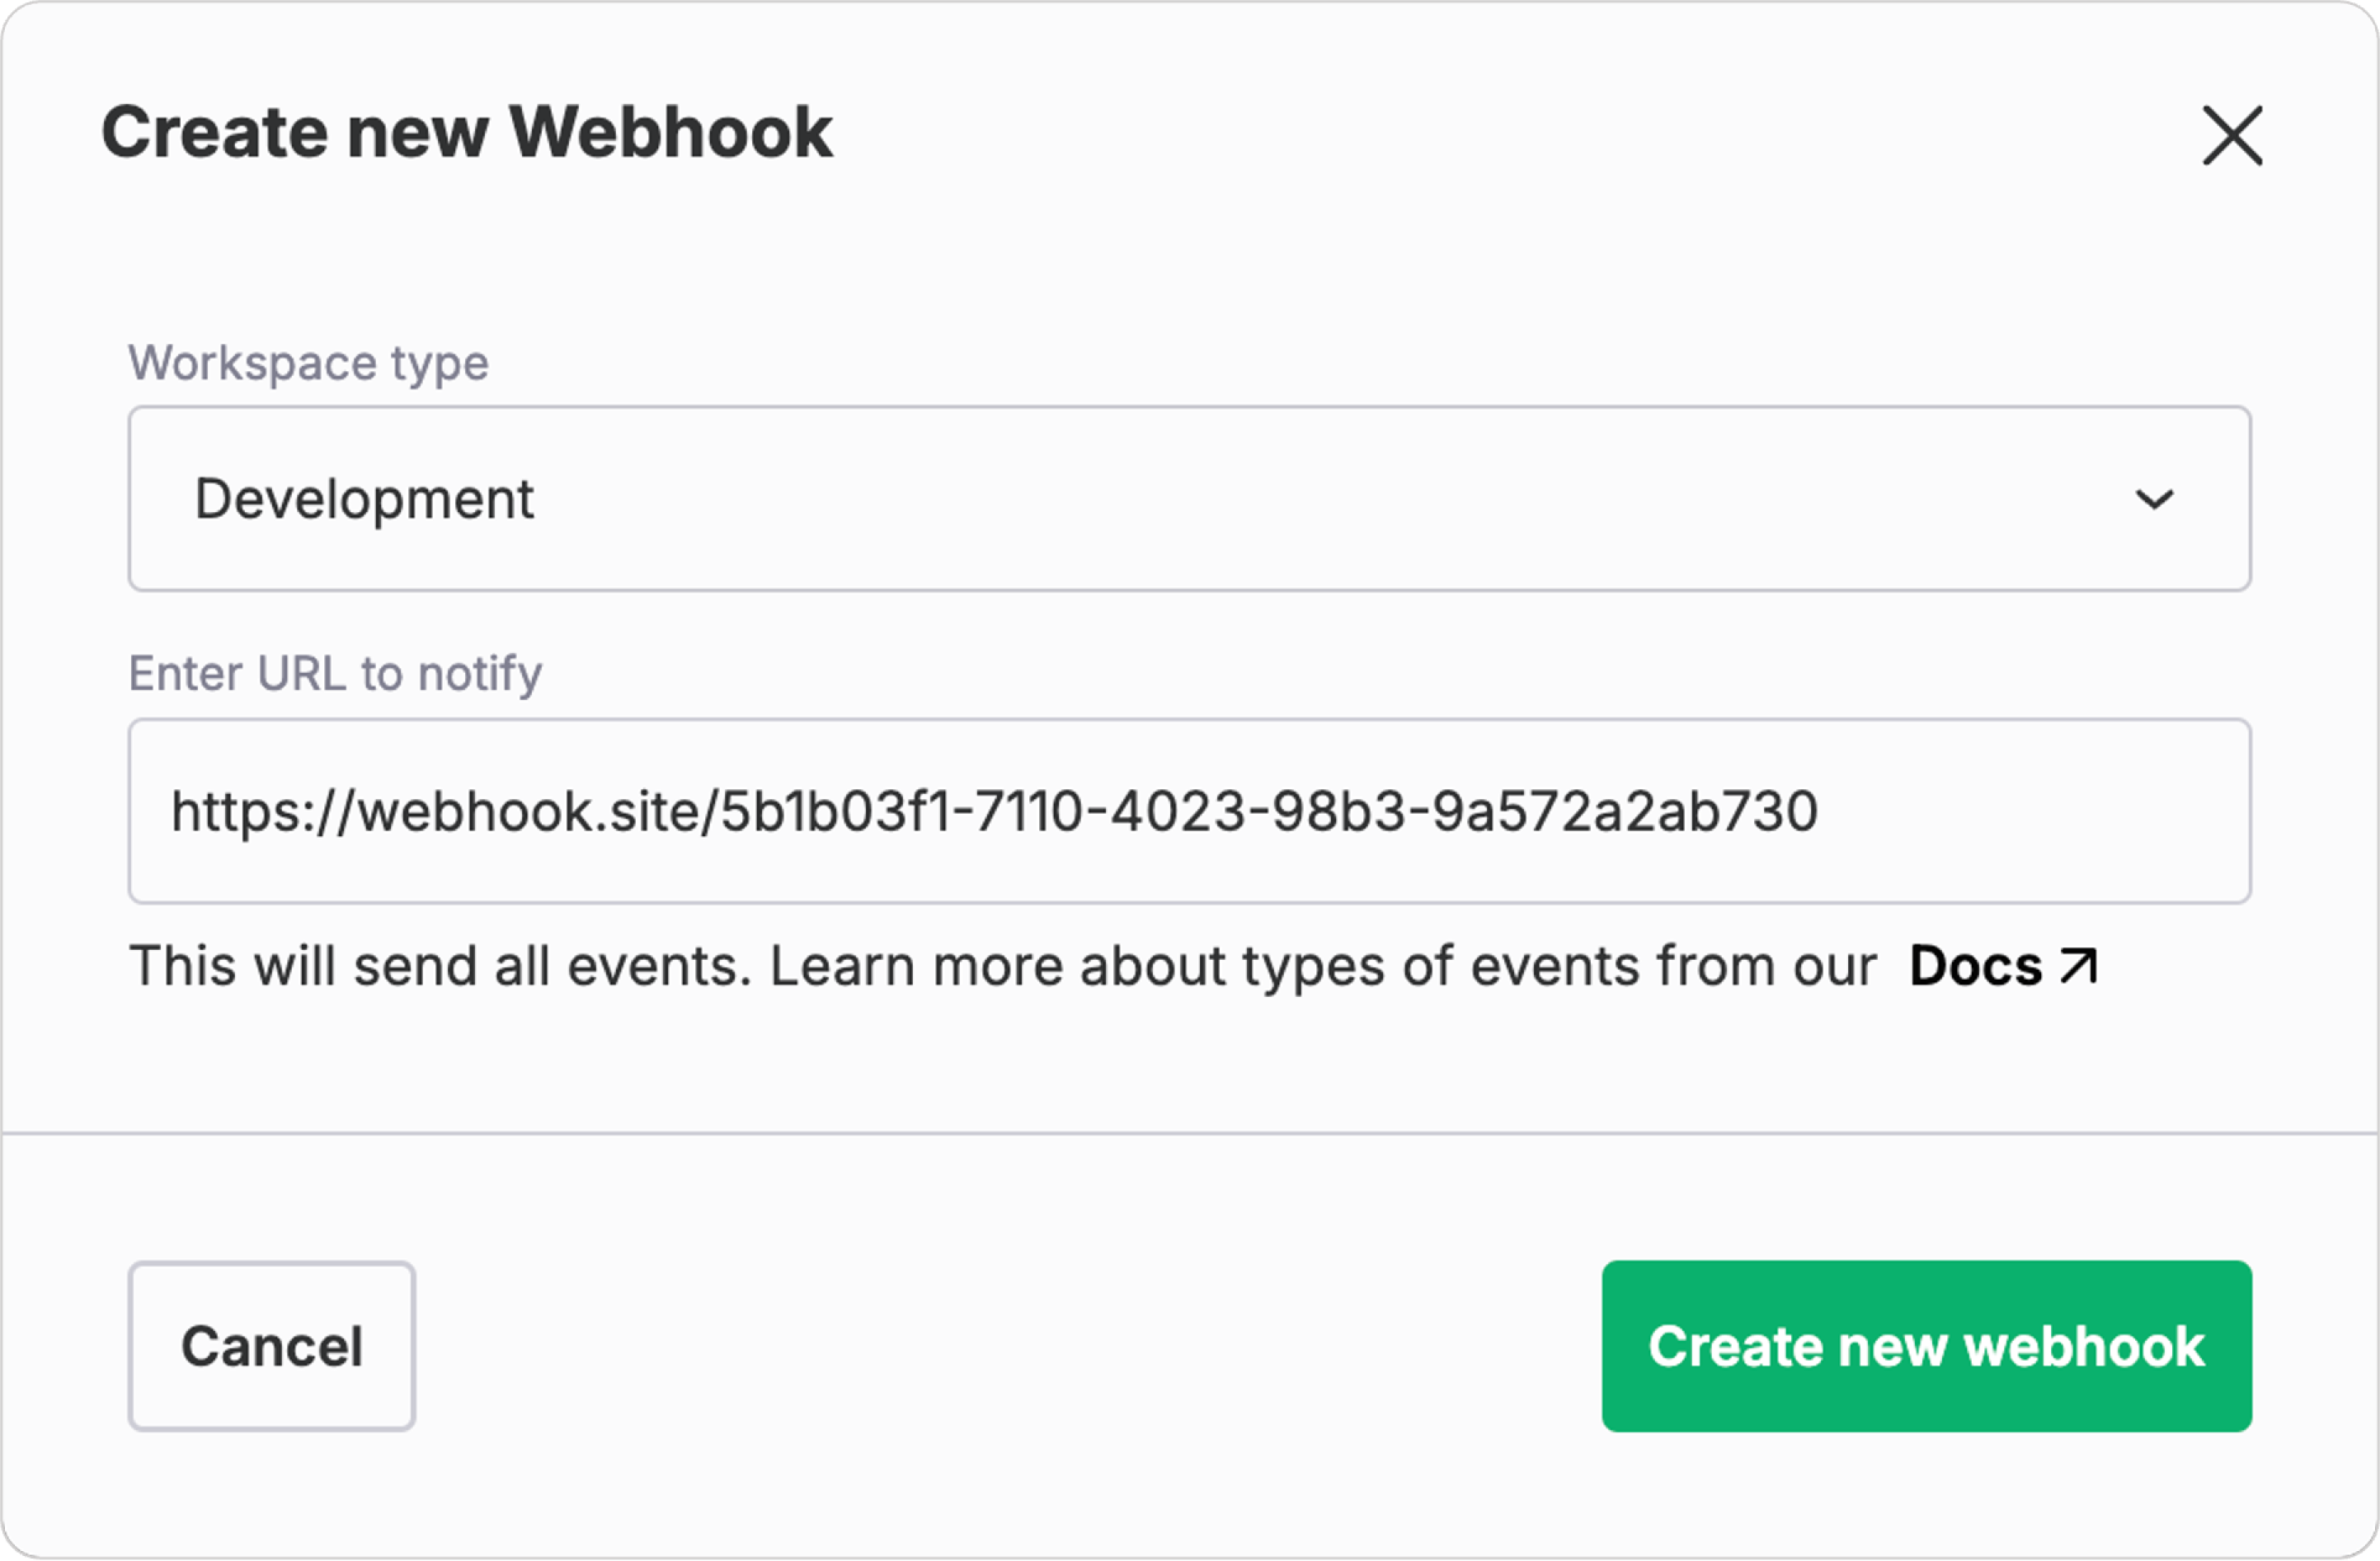
You can get a webhook proxy unique URL from webhook.site and create a webhook API for a particular workspace. For now, copy the generated unique URL and place it under “Enter URL to notify” on the FastPix dashboard as displayed above.
USING Webhook.site
Webhook.site is a tool for building software that not only use webhooks but other types of communication, either by allowing developers to inspect the data that's being sent via a webhook, but also helps users create workflows that respond to and interact with webhooks from various systems.
When visiting Webhook.site, users instantly get a free, unique, random URL and e-mail address. Everything that's sent to these addresses are shown instantly. With this, users can test and debug Webhooks and HTTP requests, as well as create workflows using the Custom Actions graphical builder or WebhookScript, a simple scripting language, to transform, validate and process HTTP requests in a variety of ways – without setting up and maintaining your own infrastructure.
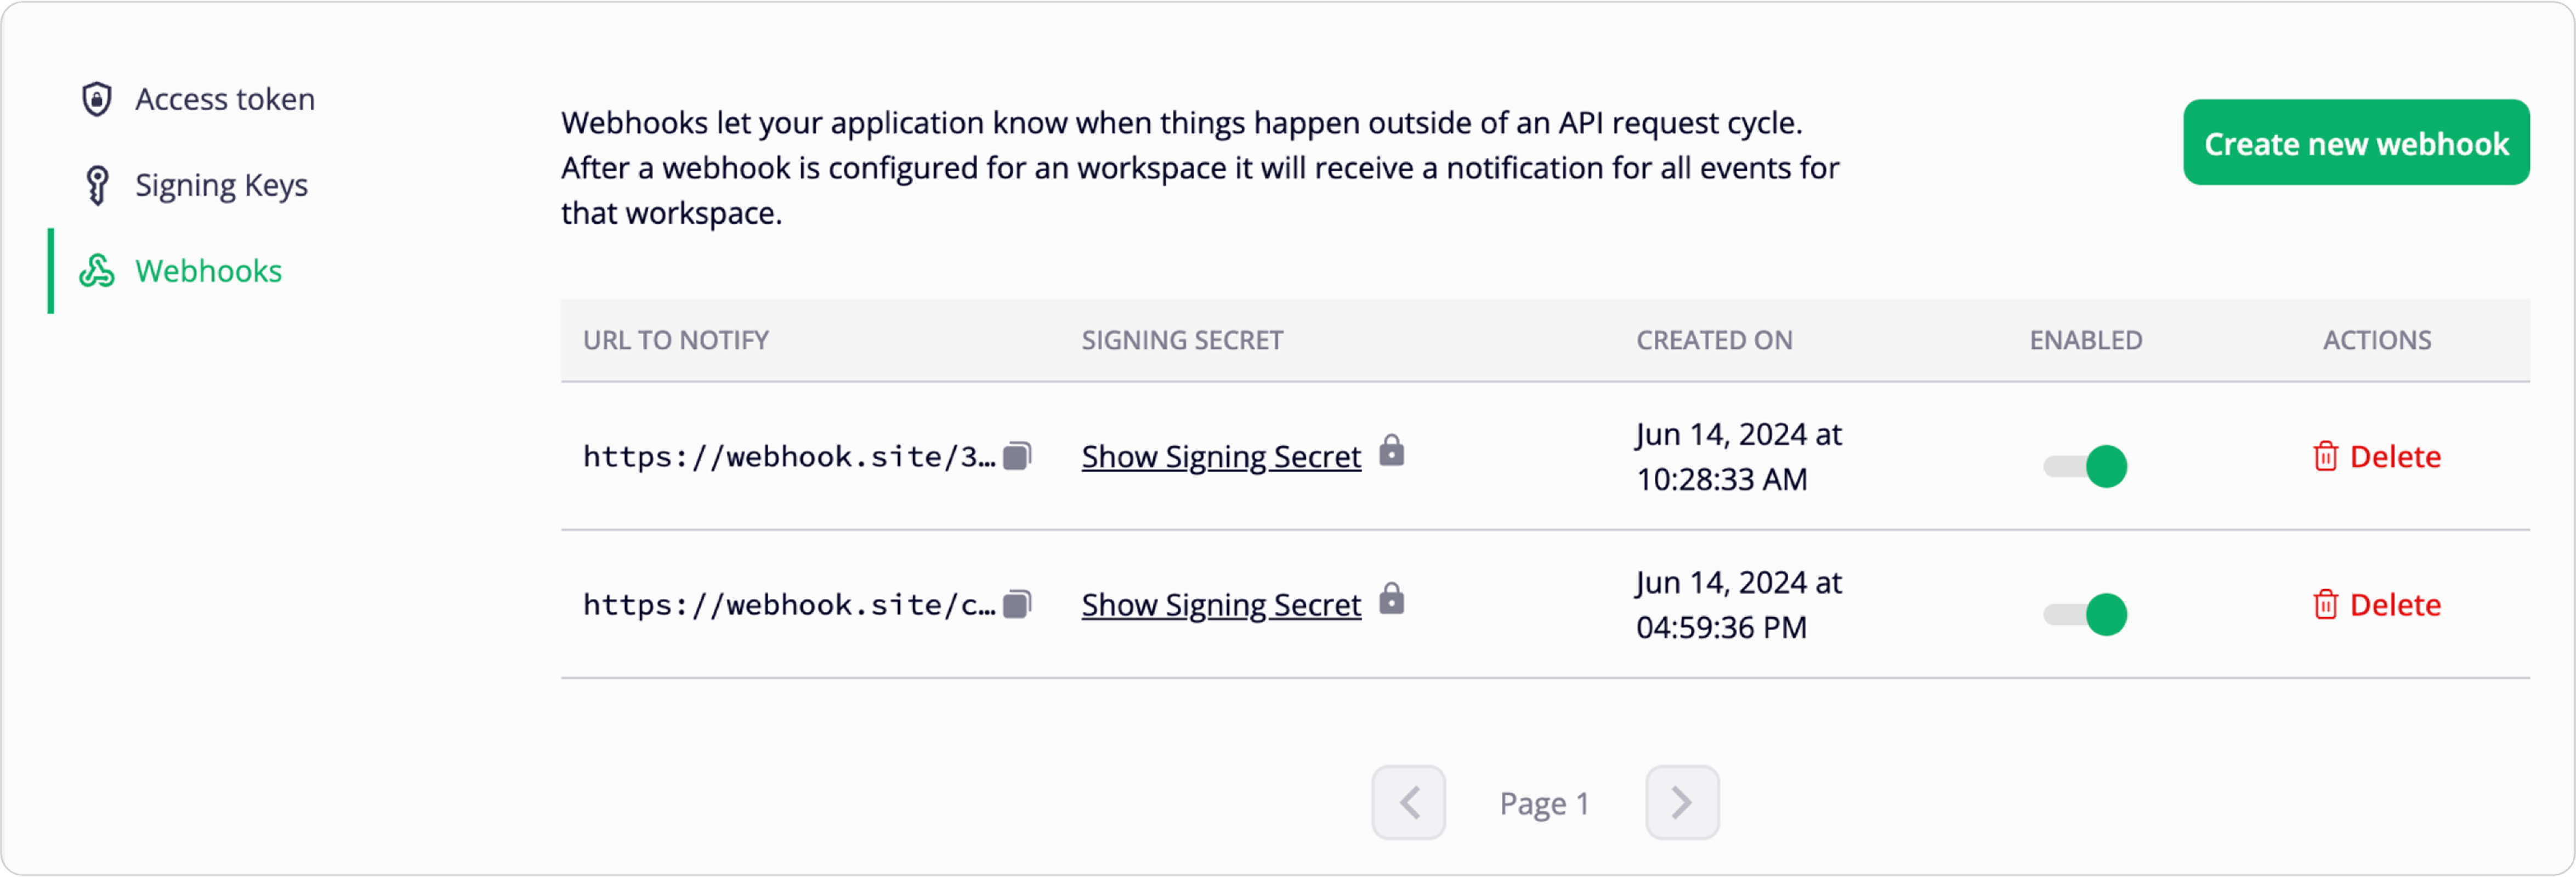
Once webhook is created, you'll see the new webhook listed in your FastPix dashboard for the chosen workspace, along with its corresponding URL
Receiving events
You can test the webhook you just created to ensure it receives events for your website URL. For this, try sending a test event like pull or push video from FastPix to verify it reaches your specified URL.
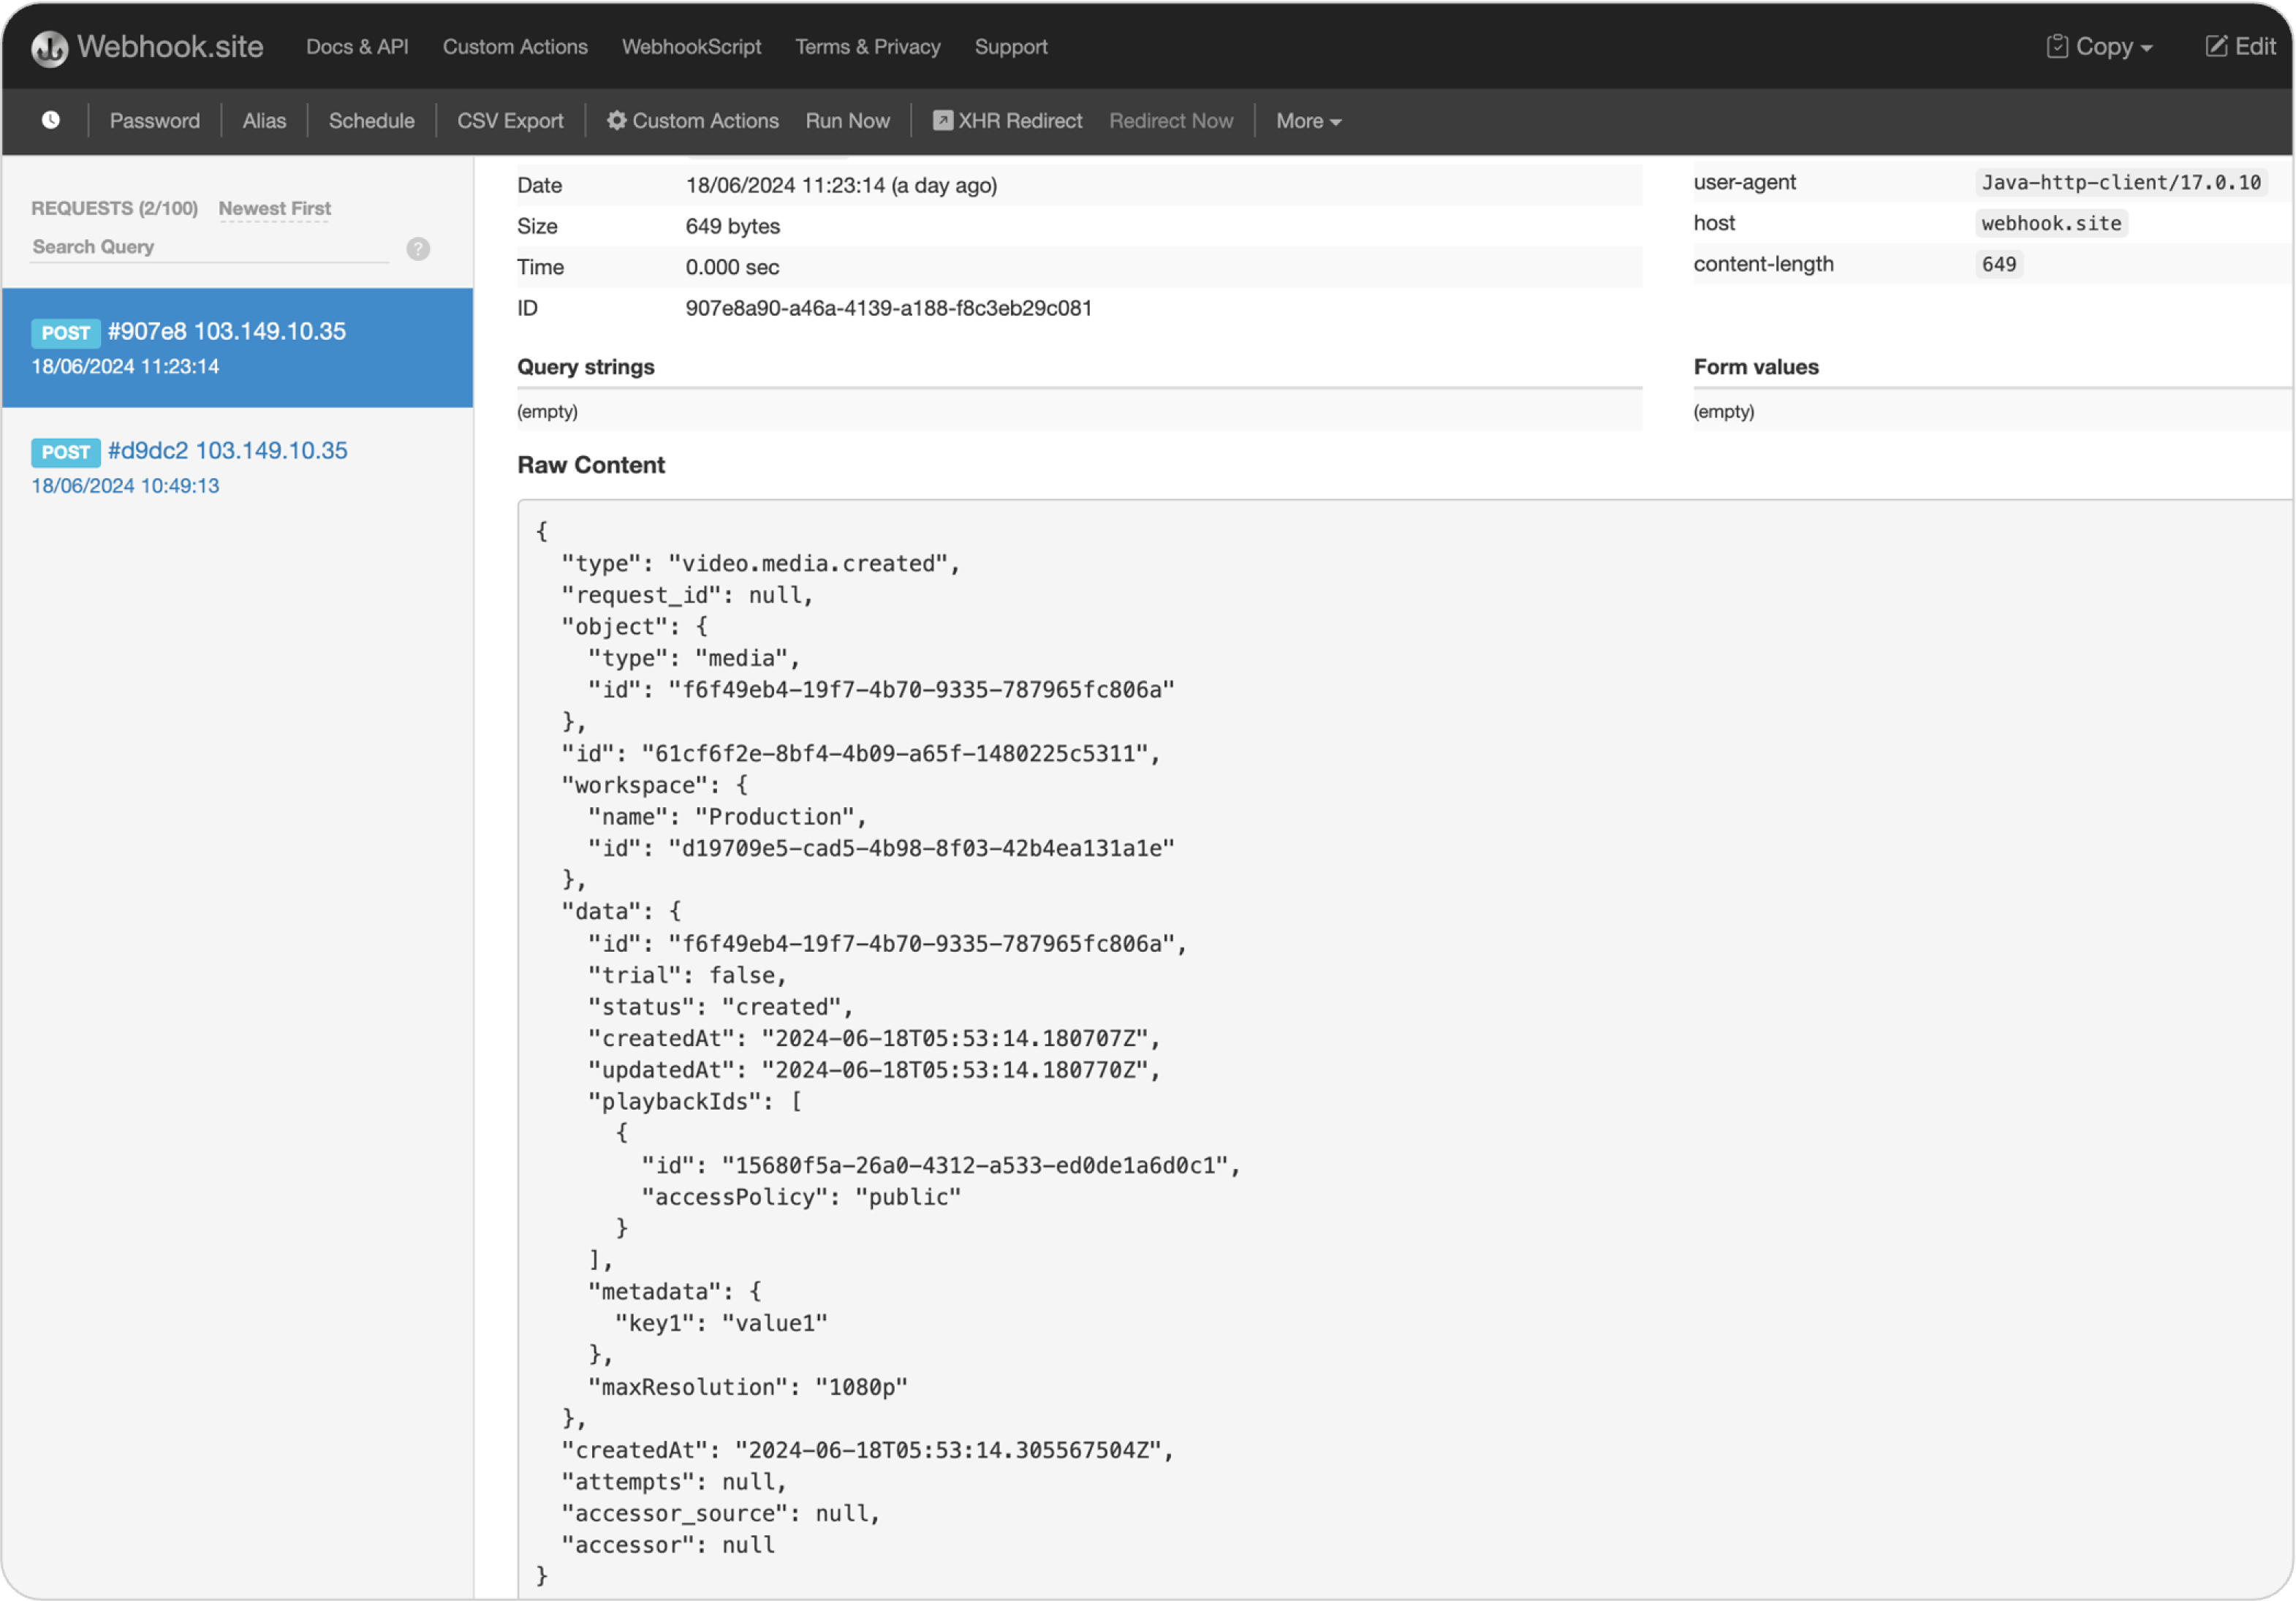
FastPix will shoot over a message to the URL you provided using a POST request, and your app can handle it just like any other route. Your event handler gets to decide what happens next – like updating the status of a specific asset in your database or kicking off other tasks.
Here is how the webhook event (response) looks like on webhooks.site:
Capturing all events and log activities
To see all events related activity for any media, click on any media listed out under media dashboard – this opens up the media details page. Next, you can view the event and logs under the API activity section.
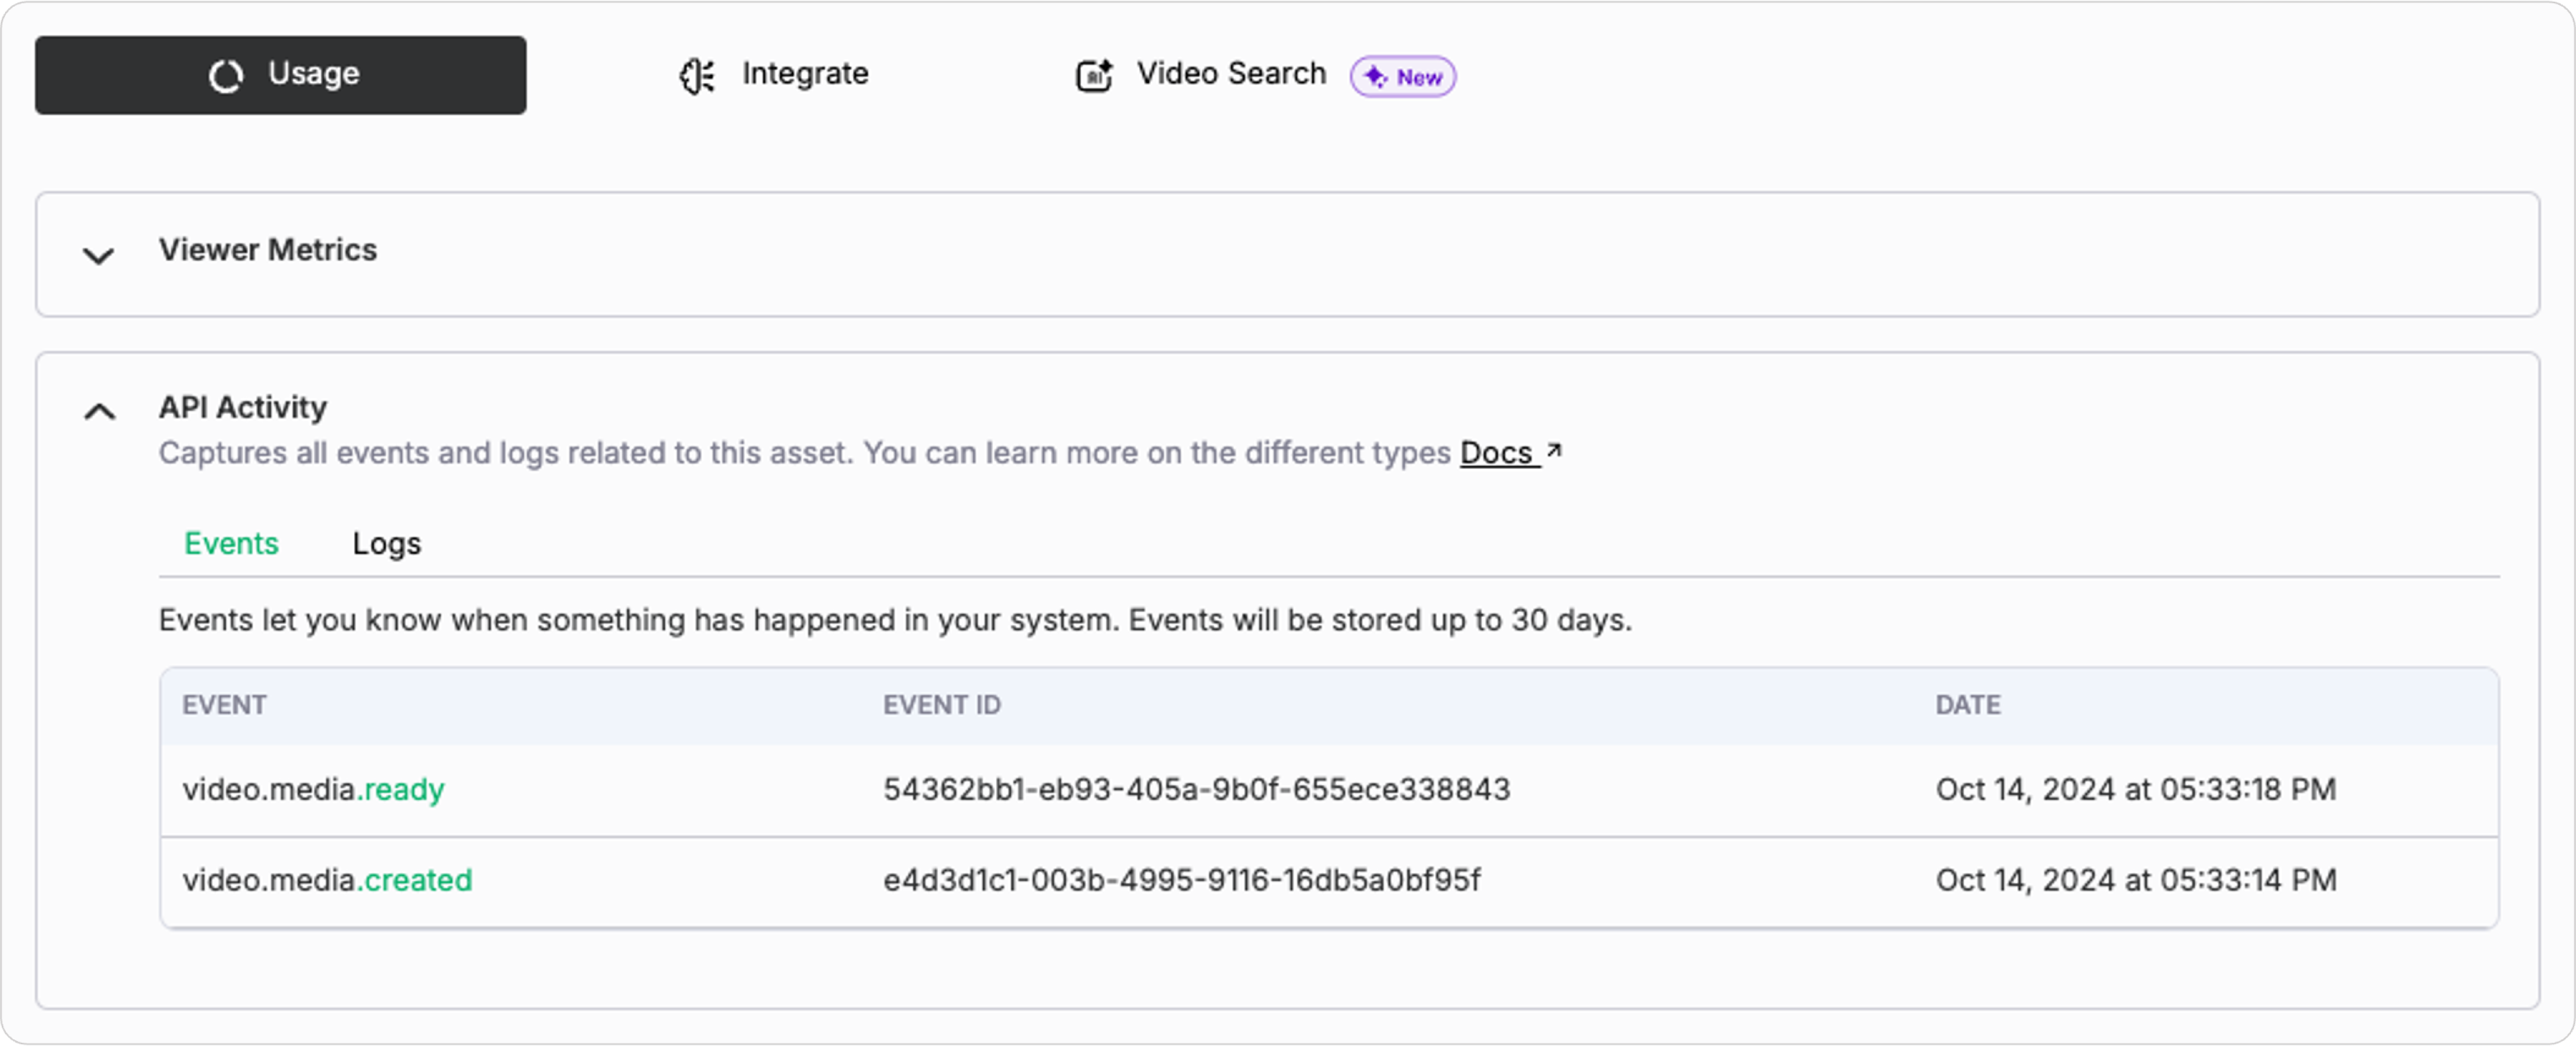
To further deep dive and get additional information about events, click on any event such as video.media.ready which would open up the event detail page
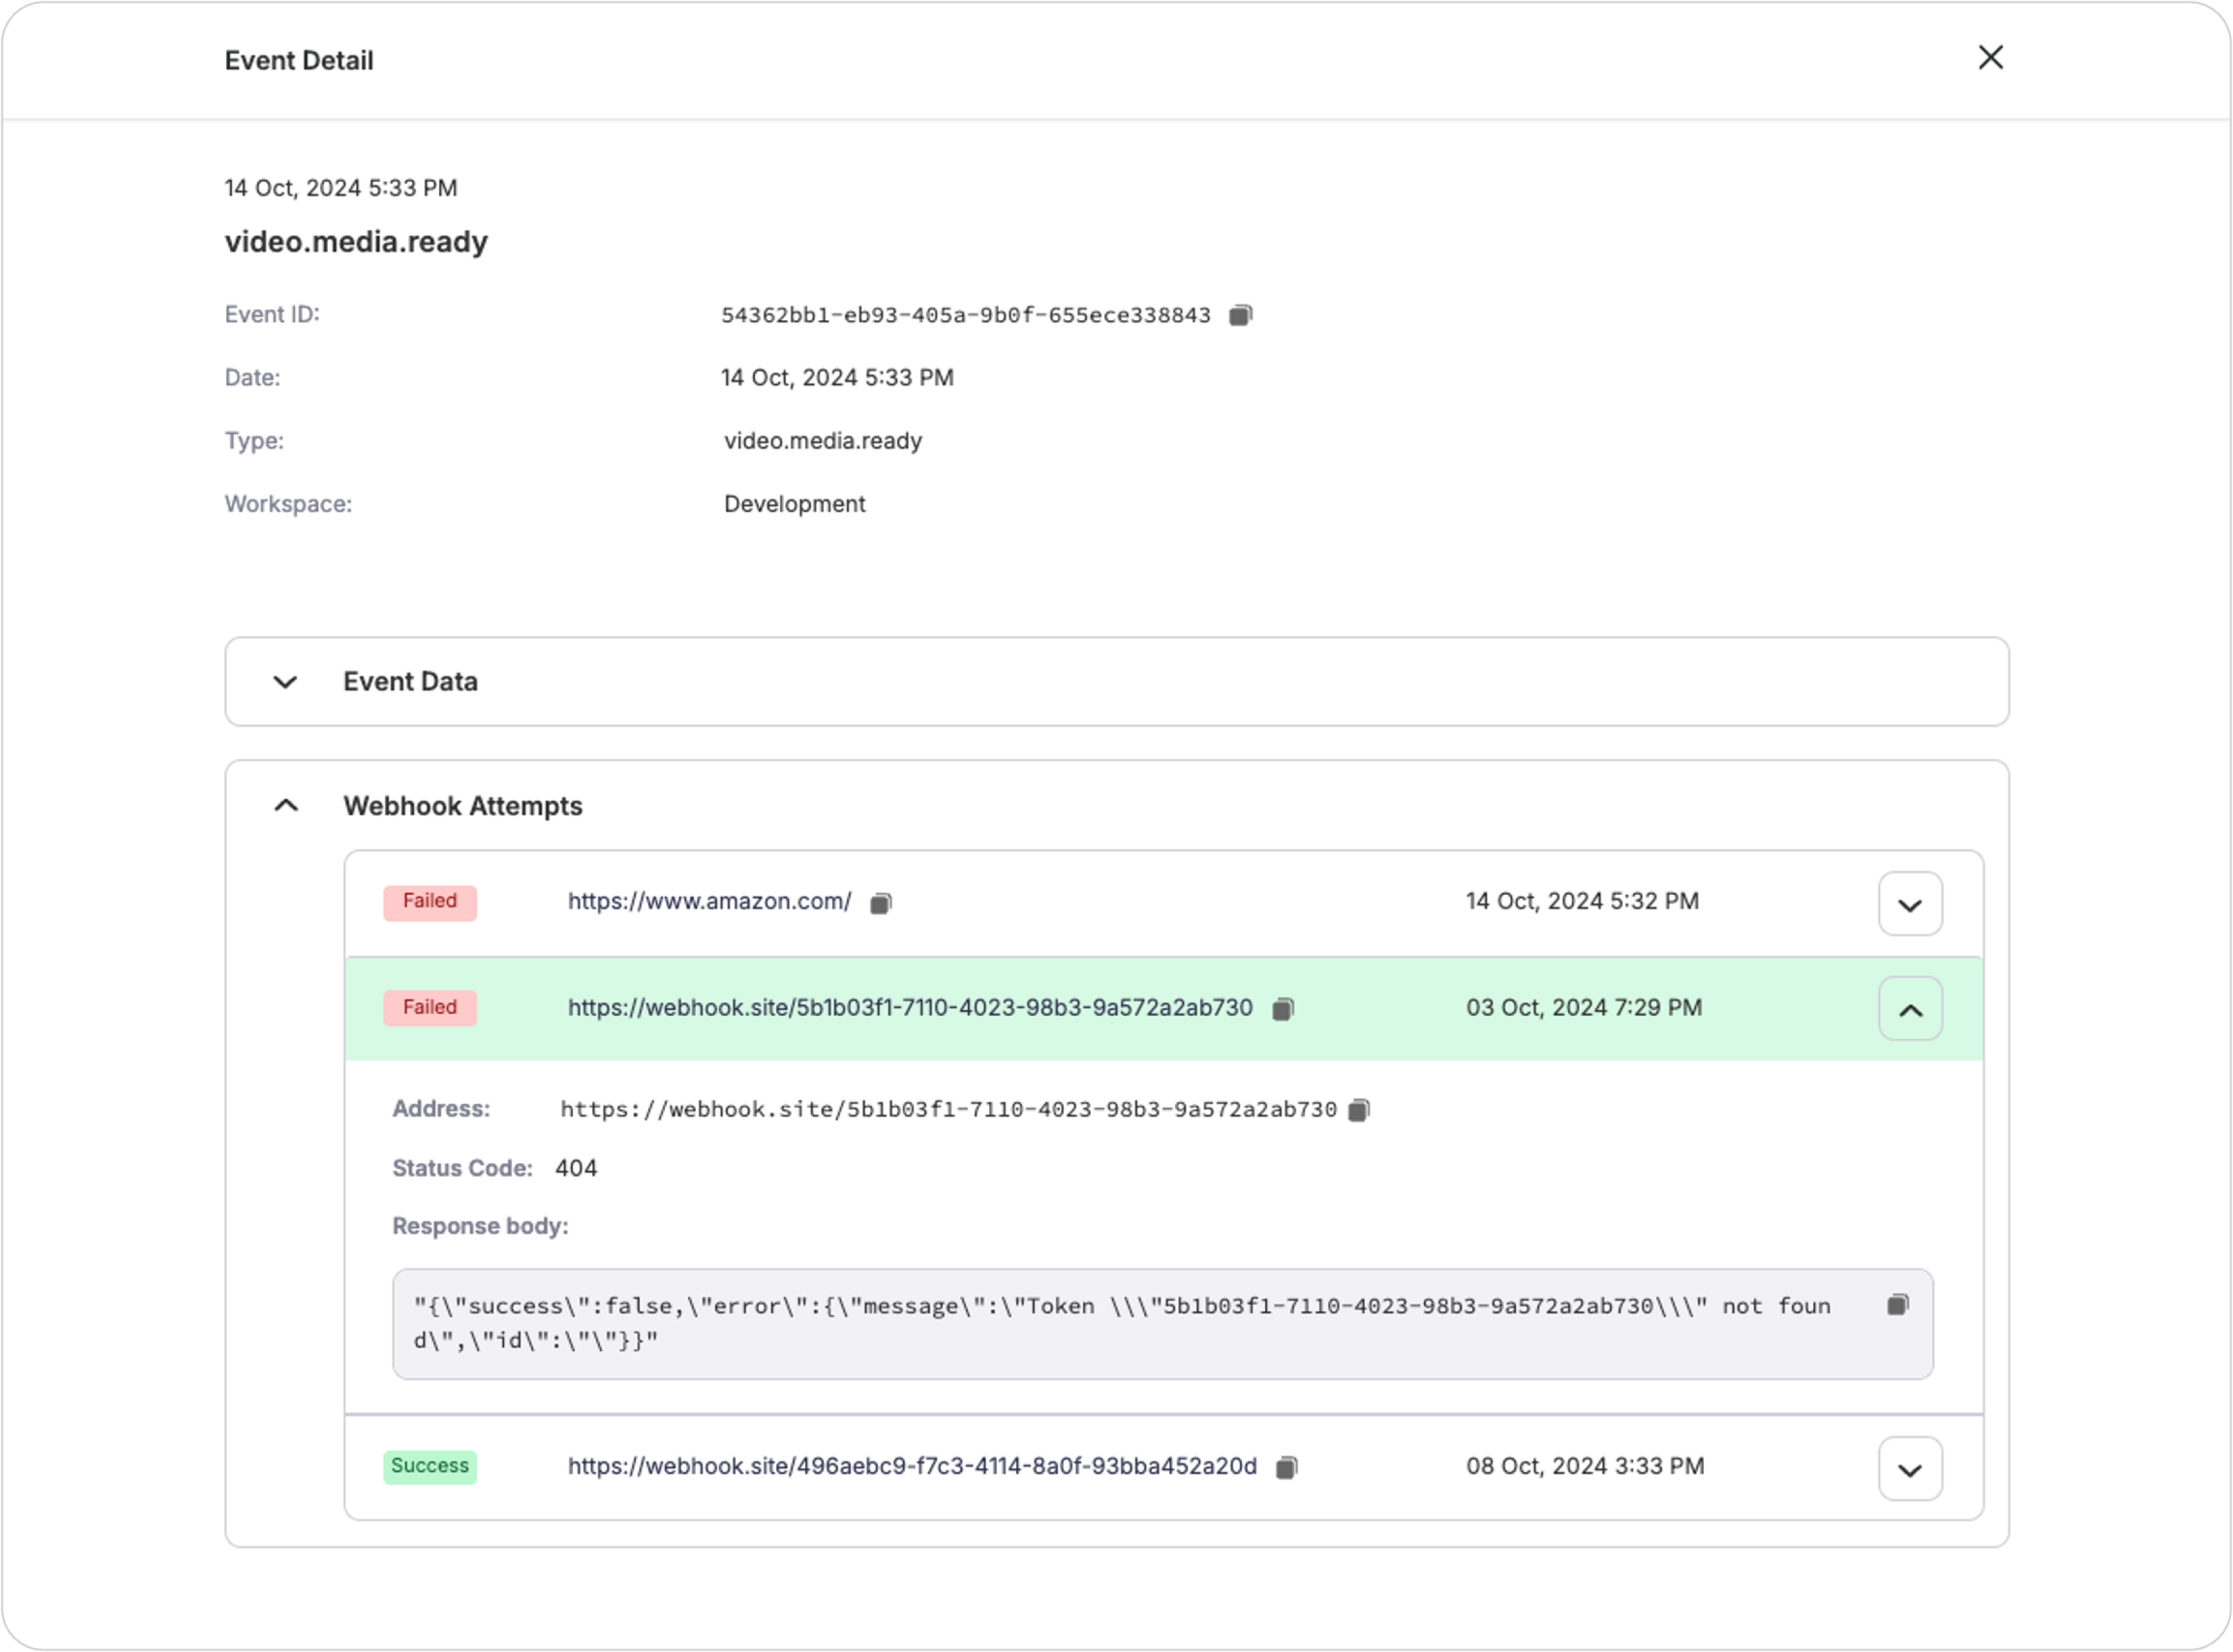
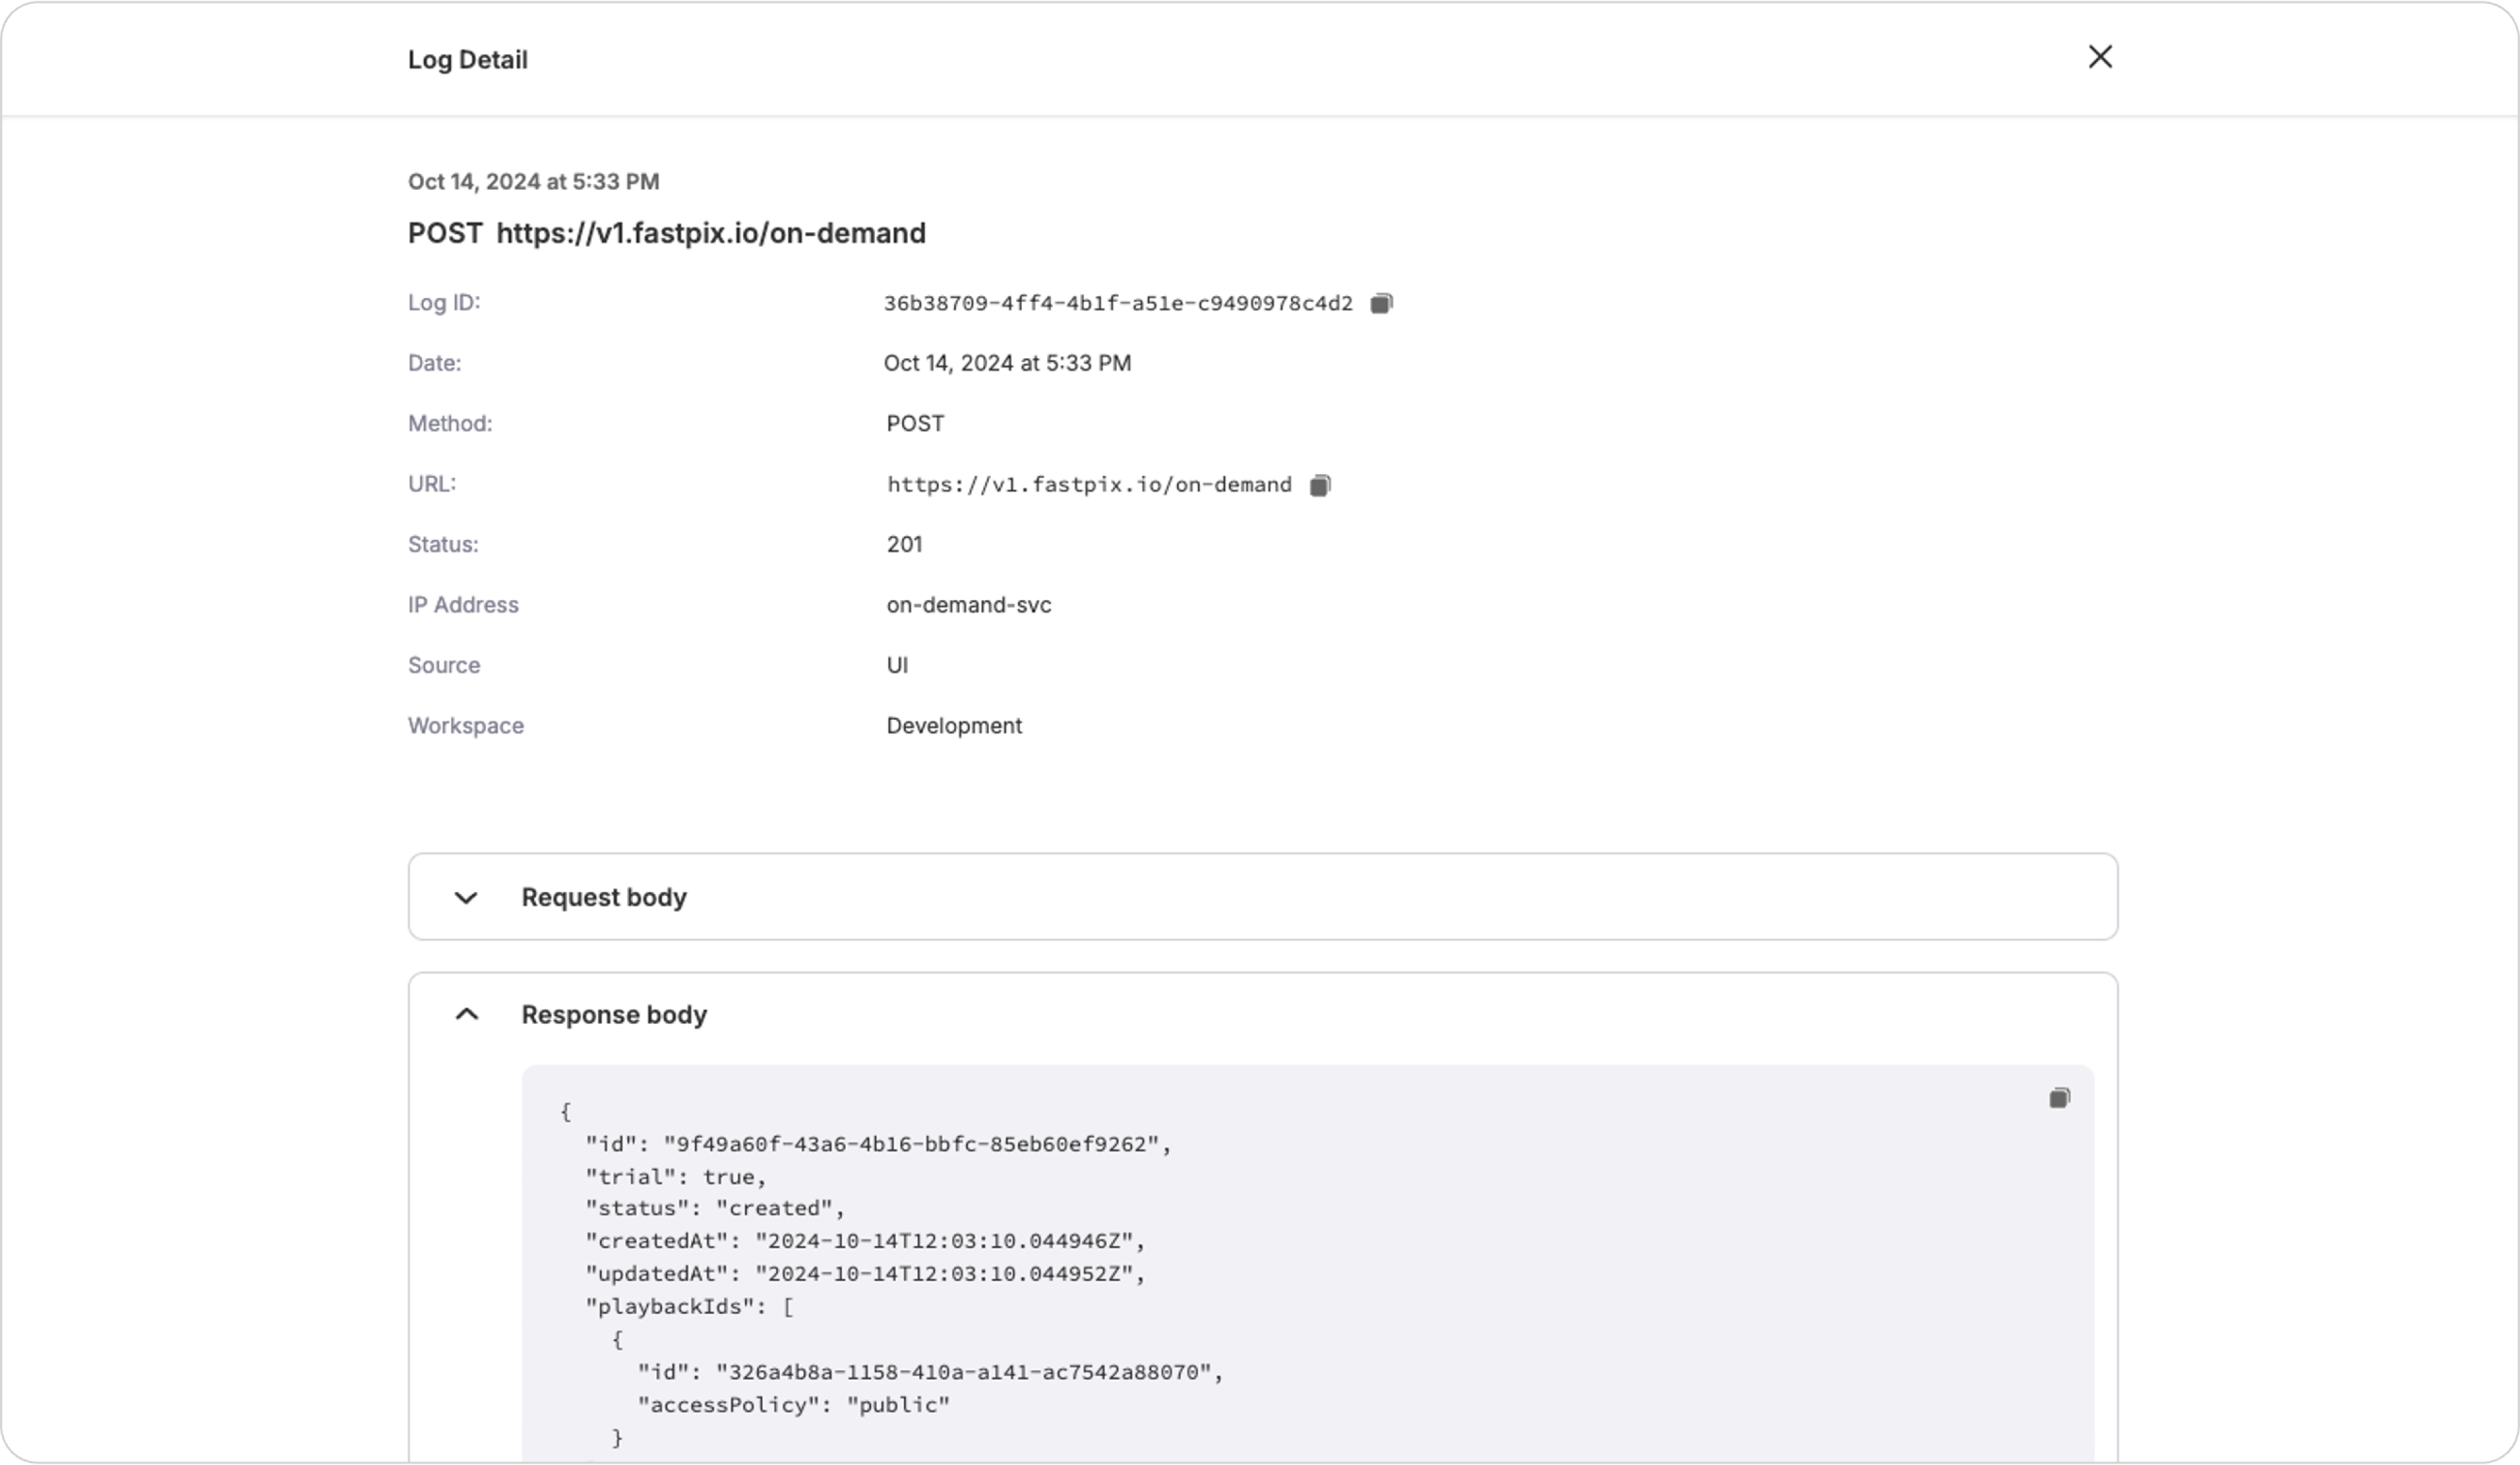
Apart from events, FastPix also provides webhook logs which shows every API action taken in the last 30 days. This helps you to check if FastPix received your request correctly, especially when a media fails.
Verify webhooks
In this guide, we’ll cover how to verify webhook signatures from FastPix to ensure that the payloads your application receives are legitimate and have not been altered. Signature verification is a vital security measure that prevents tampering and helps maintain the integrity of your data.
Why should you verify webhook signatures?
Webhook signature verification offers the following benefits:
- Security: Protects your application from potential security threats by preventing malicious actors from sending fake or manipulated payloads.
- Data integrity: Ensures that the payload remains unaltered and is exactly as FastPix intended.
- Trust: Increases the reliability of your FastPix integration by verifying that all data exchanges are valid.
Steps to verify FastPix webhook signatures:
Step 1: Retrieve your signing key
The first step is to get your unique webhook signing key from the FastPix dashboard:
- Log in to your FastPix account.
- Navigate to the "Webhooks" section under the settings or API tab.
- Locate your specific webhook and note the "Signing Secret". This is the secret key that FastPix uses to sign the webhook payloads it sends to your application. You will use this key to validate that the payload is genuine.
Step 2. Receiving webhook payloads
When FastPix sends a webhook to your designated endpoint, it includes a signature in the HTTP headers. This signature is used to verify the authenticity of the payload.
- The signature is located in the FastPix-Signature HTTP header.
- The value of this header is a Base64-encoded HMAC-SHA256 hash of the payload.
Here’s an example of what your endpoint might receive:
POST /your/webhook/endpoint HTTP/1.1
  Host: yourdomain.com
  Content-Type: application/json
  FastPix-Signature: 8Yus0f4y9AMxkkq7x7wiUQmyM+d0shUQLsodxrAE6HU=
  "type": "video.live_stream.created",
  "object": {
  "type": "live"
  "id": "73183ed5e86620908e28a1072f429b8c"
 },
 ...
}
Step 3. Verify the signature
To verify the signature, follow these steps:
- Extract the FastPix-Signature header: This is the Base64-encoded HMAC-SHA256 signature sent by FastPix.
- Generate the HMAC-SHA256 signature: Use the signing key obtained from the FastPix dashboard to generate an HMAC-SHA256 hash based on the raw webhook payload (the body of the HTTP request). This step ensures that the signature is generated in the same way as FastPix does.
- Compare the generated signature with the FastPix-Signature:
- If the generated signature matches the signature from the header, then the webhook is verified.
- If the signatures don’t match, the payload may have been tampered with or the signing key might be incorrect, and you should reject it.
Code snippet for signature generation
Here’s a minimal reference for generating HMAC-SHA256 signatures:
String signingKey = "<your_signing_key>";
String payload = "<your_payload>";
String calculatedSignature = SignatureUtil generateSignature (payload, signingKey);
Parameters to use
When implementing webhook signature verification, you'll need to work with the following parameters:
- Payload: This is the raw JSON string of the webhook payload received from FastPix. Ensure that it is used exactly as received, as any alterations can affect the signature verification process.
- Provided Signature: This is the signature included in the FastPix-Signature header. It is what you will verify against the signature you generate.
- Signing Key: This is the Base64-encoded key retrieved from your FastPix dashboard. You’ll use this key to generate the signature and verify the payload’s authenticity.
Common issues to watch for
- Incorrect signing key: Double-check that you’re using the correct signing key from your FastPix dashboard. If you’ve recently rotated your keys, ensure you’re using the updated one.
- Base64 encoding: Verify that both the payload and signing key are properly encoded in Base64. Any mistakes in encoding can lead to signature mismatches.
- Payload alteration: Ensure that the payload remains unchanged from when it was received. Even minor changes such as formatting or whitespace can invalidate the signature.
Updated 2 months ago